Decorative pumpkins to place on your windowsill or entryway table are the perfect way to celebrate the wonders of fall!
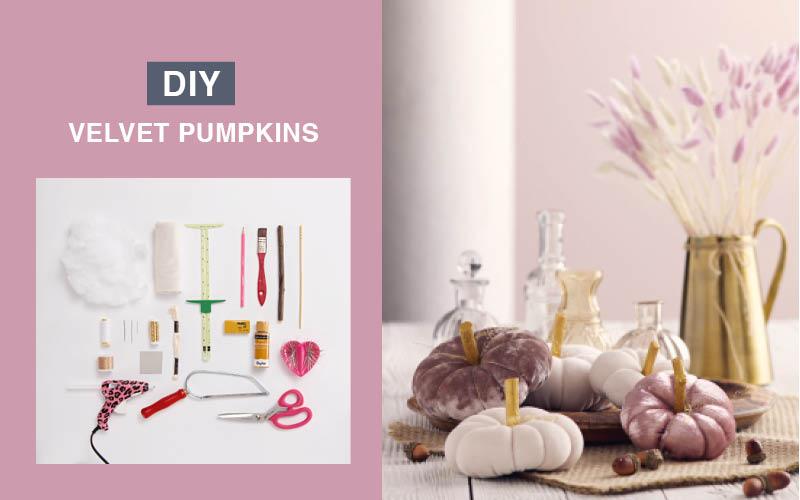
Materials

|
|
STEP 1

Cut a circle measuring approximately 24 cm (10 in) in diameter with the help of the sliding gauge. Gather the edges by hand, making sure to use a double thread so it does not break.
STEP 2

Fill the circle with the craft stuffing, tighten the threads, and tie them. Use embroidery or metallic thread to sew the separations and tie them together at the bottom of the pumpkin.
STEP 3

Cut out a circle approximately 3.5 cm (1 1/2 in) in diameter from the carton. Trace this circle to the wrong side of the fabric. Add a sewing allowance of approximately 1 cm (1/2 in) and then cut it. Place the carton inside the circle, gather the edges by hand, and tie the thread at the bottom.
STEP 4

Use a hot glue gun to glue the bottom (the circle with the cardboard insert from step 4) and then sew its edges to the pumpkin by hand.
STEP 5

Wind the gold wire around the dowel and sew it to the top of the pumpkin by hand.
STEP 6

Use the handsaw to cut the twig so it measures approximately 5 cm (2 in) in length. Insert a pin into the end of the twig and shape a piece of Fimo polymer clay around this so you have something to hold onto. Hold onto this as you paint the twig gold with the other hand. Let it dry and then glue this to the top of the pumpkin with the hot glue gun.
AND YOU'RE DONE!

Use these adorable pumpkins to decorate your table for a Halloween party or to just add a bit of an autumn vibe to your home!
And if you would like to print this DIY workshop to work on later, feel free to download it for free by clicking on the button below