While the sewing machine revolutionised garment making, hand sewing continues to hold an essential place in the world of creation. It allows you to create invisible finishes, ensures flexible basting, and reinforces stress points. Each hand technique serves a specific purpose and complements what the machine can do. This article outlines the key stitches to know, helping you decide when to pick up the hand needle for a precise and lasting finish.
Hand Sewing Stitches
Use a single thread: you only double the thread when sewing on buttons, poppers or hooks and eyes, or you can use thicker buttonhole thread. Less expensive basting thread is used for basting. The needle should also be suitable for the fabric and thread.
Before looking at each stitch in detail, remember that they differ in their function (joining, basting, reinforcing, decorating) and in their visibility on the right side of the fabric. Here is an overview of the main hand stitches, their uses, and their technical characteristics.
The rule of thumb: The finer the fabric, the finer the thread and needle. And use a short needle for fine stitches and a long needle for long stitches. Secure the beginning of the seam with a knot and the end with a few backstitches.
Running stitch: You can use the running or basting stitch to baste two or more pieces of fabric together, baste pockets, trim and other pieces in place or mark lines.
Sew from right to left. The stitches will alternately be visible on the top and bottom sides. The stitch length depends on how permanent the stitches need to be. With very small running stitches, you can also gather and ease pieces.
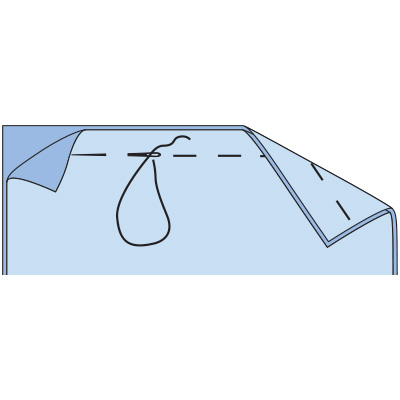
Use a diagonal running stitch if the layers of fabric must not shift in either the lengthwise or crosswise direction.
Stitch from the top to the bottom or the bottom to the top. Pass the needle out to the left of the spot where you inserted it. Short stitches at close distances give stability to layers of fabric: for example, on a lapel collar.
If you only need to baste two layers of fabric together – fabric and volume fleece or lining, for example –, the stitches can be longer and the distance between them larger.
The seed stitch is only visible as a small dot on the right side of the fabric. It is primarily used for sewing on zip fasteners.
Stitch from right to left: Insert the needle and then pass it out after approx. 5 mm (1/4 in). After 1 or 2 yarns of the fabric, insert the needle again, pass it out after approx. 5 mm (1/4 in) and repeat.
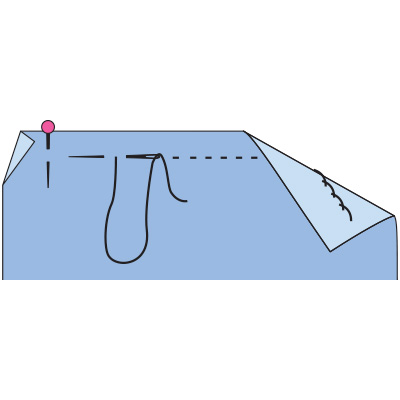
The back stitch is the most stable of all hand sewing stitches. Today it is only used to close short seam openings or repair seams when it doesn’t pay to get the sewing machine ready to stitch.
Insert the needle and then pass it out after approx. 5 mm (1/4 in). Approx. 3 mm (1/8 in) away, insert the needle again and pass it out after 2 x the stitch length. Insert the needle again exactly in the hole you just made when passing the needle out, repeat. Stitch from right to left.
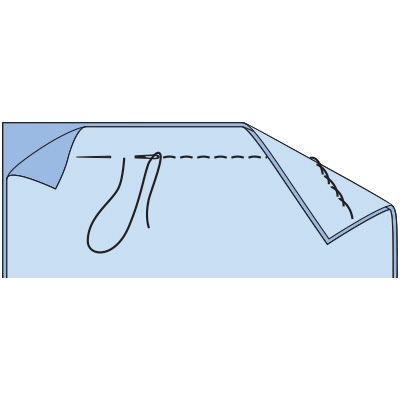
The ladder stitch (invisible stitch, slip stitch) is almost invisible and is primarily used to sew on lining. However, it is also useful for sewing two folded fabric edges together or repairing a seam
that has burst open and is difficult to access from the inside. Stitch from right to left.
How to sew on lining: Insert the needle into the folded edge of the lining and pass it out to produce the required stitch length. Exactly opposite to the spot where you passed the needle out,
insert the needle into the hem allowance or the facing. Pass it out to produce the required stitch length – do not catch the right side of the garment! Exactly opposite to the spot where you passed the needle out, insert the needle into the folded edge of the lining again, and repeat.
If you are sewing two folded edges together by hand, always alternate between the two folded edges when inserting the needle.
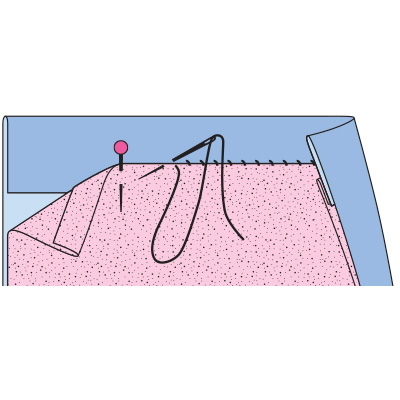
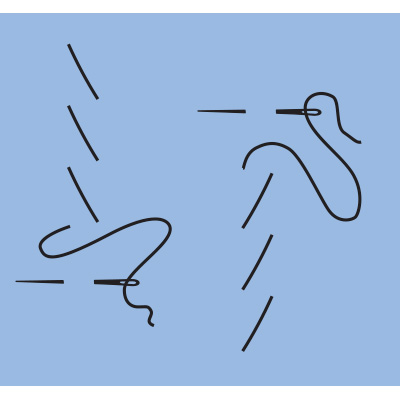
The herringbone stitch is actually a decorative or embroidery stitch. Non-fusible interlining can be sewn on with the herringbone stitch, or two fabric edges can be tacked together. For very thick fabrics and stretch fabrics, the herringbone stitch is also used to sew on hems.
Stitch from right to left with small running stitches that are offset diagonally towards the top or bottom. When sewing on interfacing, make sure that the stitches are not visible on the right
side of the fabric. In other words, catch as little of the fabric as possible. The stitches can be larger on the interfacing, but do not catch the fabric underneath it.
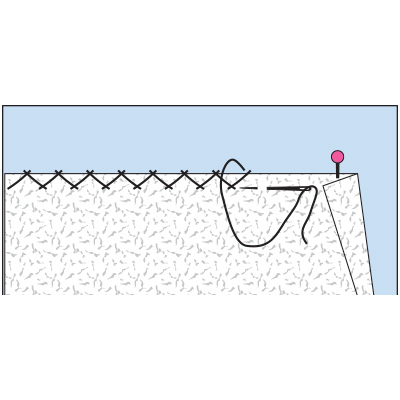
Stitch from right to left with small running stitches that are offset diagonally towards the top or bottom. When sewing on interfacing, make sure that the stitches are not visible on the right
side of the fabric. In other words, catch as little of the fabric as possible. The stitches can be larger on the interfacing, but do not catch the fabric underneath it.
And to find all the sewing basics and beginner-friendly patterns in one single book: