Close your eyes! Luxury can be so easy - like these sleep masks, thanks to the easy step-by-step instructions and pattern below. They also make a fabulous gift and way to use up a lot of scrap fabrics.
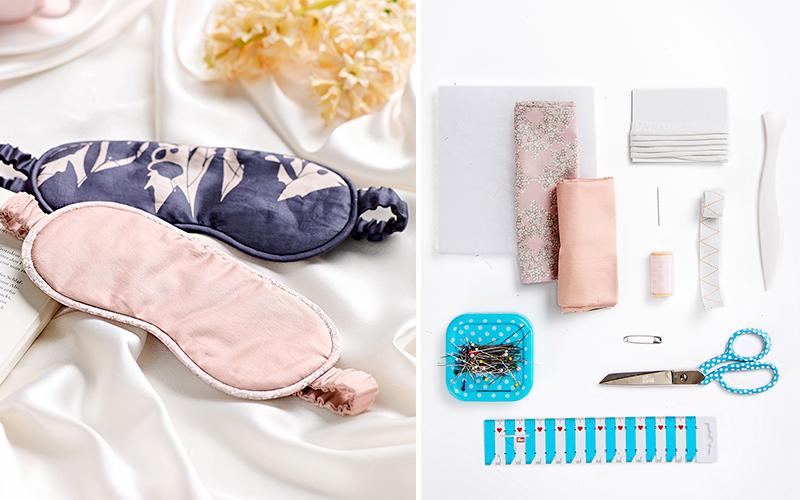
Materials

Cotton fabrics
Batting
Elastic band, 2 cm (3/4 in) wide approx. 40 cm (15 3/4 in)
Iron-in polyester piping approx. 55 cm (21 3/4 in)
Scissors
Straight pins
Safety pin
Sewing needles
Seam gauge
Thread
Edge shaper
Download the pattern here
STEP 1

Cut out the template with a 1 cm (3/8 in) seam allowance. Pin on the batting and patterned fabric and stitch approx. 7 mm (1/4 in) from the edge of the fabric. Now trim the seam allowance.
STEP 2

Cut a piece of the polyester piping 51 cm (20 1/8 in) long and sew the ends together by hand.
STEP 3

Cut bias tape pieces (5 cm (2 in) wide x 52 cm (20 1/2 in) long) from patterned fabric and stitch right sides together at a 1 cm (3/8 in).
STEP 4

Iron the bias tape around the polyester piping and stitch using your zipper foot. Trim the protruding seam allowance to 1 cm (3/8 in).
STEP 5

Cut out strips measuring 52 x 6.4 cm (20 12 x 2 5/8 in). Fold lengthwise and press. Stitch a casing at 1 cm (3/8 in). Turn right side out and pull a piece of elastic 38 cm (15 in) long through the casing. Fix the ends in place
STEP 6

Pin the prepared piping to the sleep mask contour (from step 1) and stitch using the zipper foot.
STEP 7

Pin the elastic band to the sides. Cut out the template again from the patterned fabric and pin it to the mask right sides together.
Finished

Stitch the entire edge, leaving an opening for turning the mask inside out. Trim the seam allowance, clip if necessary and turn inside out. Now sew the opening shut by hand.
EXTRA TIP

Make one for every member of your family! This is also a great little project to add a little customization to in terms of embroidery.