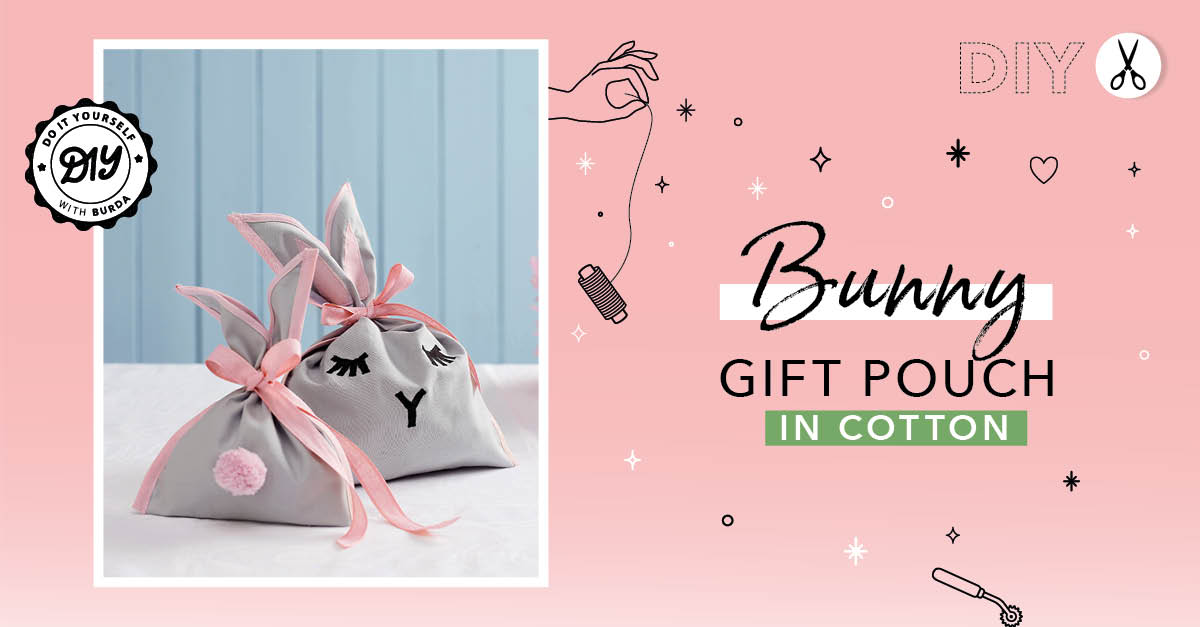
Want to add a touch of sweetness and whimsy to your Easter decor? This sewing DIY is perfect for you! Learn how to easily create an adorable bunny-shaped gift pouch—ideal for holding chocolates, decorating your festive table, or giving a personalized little treat. With its tie-up ears and a small pompom as a tail, this pouch will charm both kids and adults alike. Plus, it's a quick, fun project that’s perfect for using up fabric scraps!
In this article, we guide you step by step to sew a bunny-shaped gift pouch that’s as easy as it is fast to make.
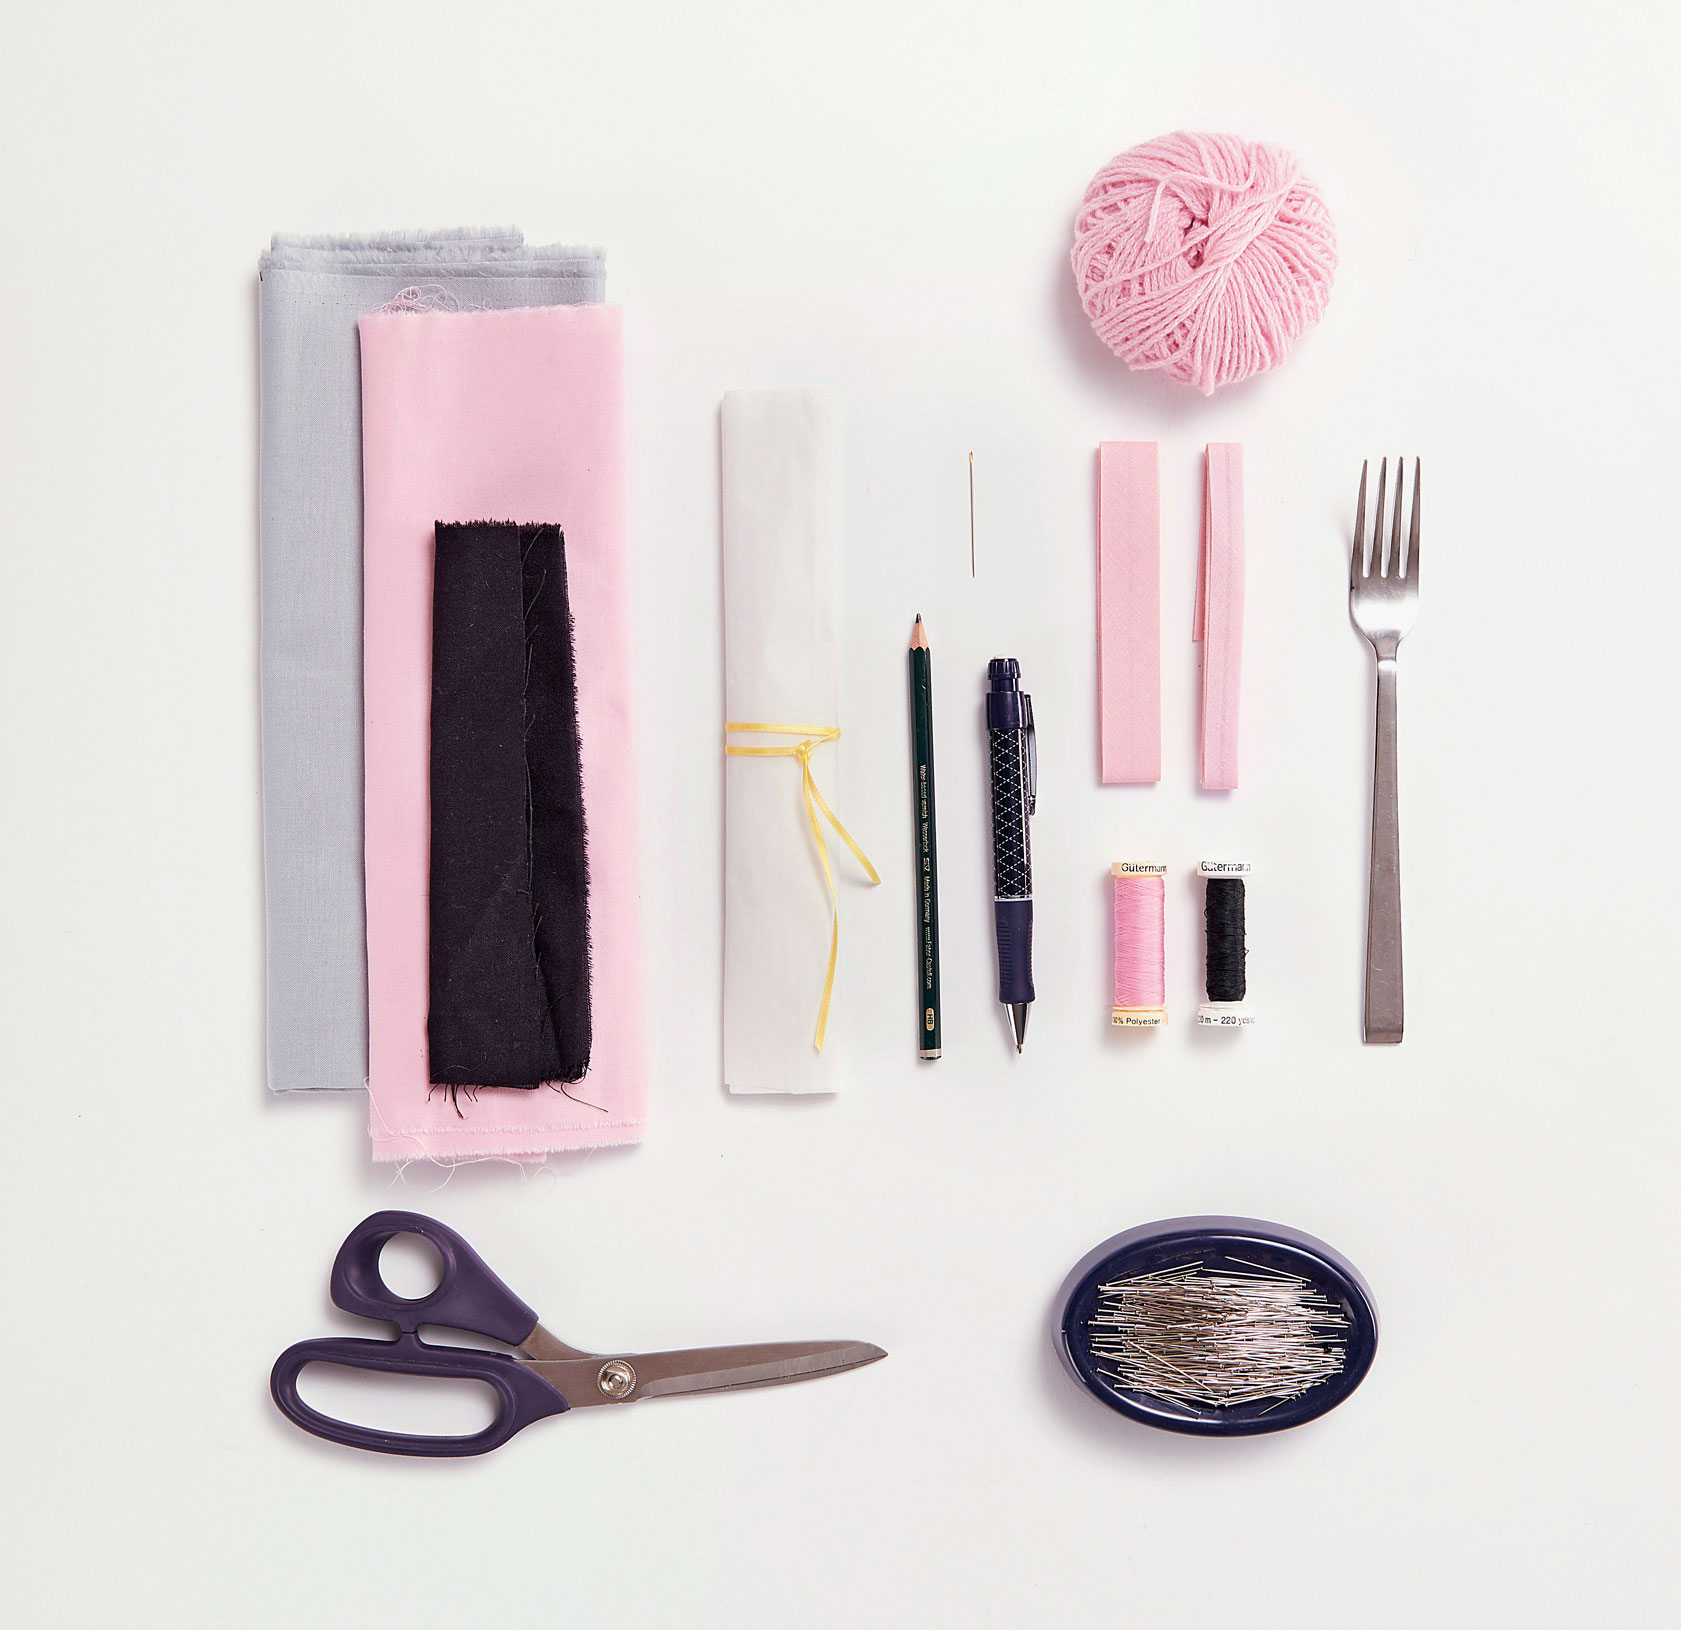
Supplies
-
Fabrics: Gray, pink, and black
-
Vliesofix interfacing
-
Pencil
-
Pink and black thread
-
Chalk
-
Scissors
-
Sewing needle
-
Pins
-
Pink bias ribbons
-
Fork
-
Wool
Cutting Out
Print the bunny template at 200%.
The sewing allowances of 1 cm are included in the pattern. You can find the instructions and the pattern in PDF format for free to download at the end of this article.
Creation
STEP 1
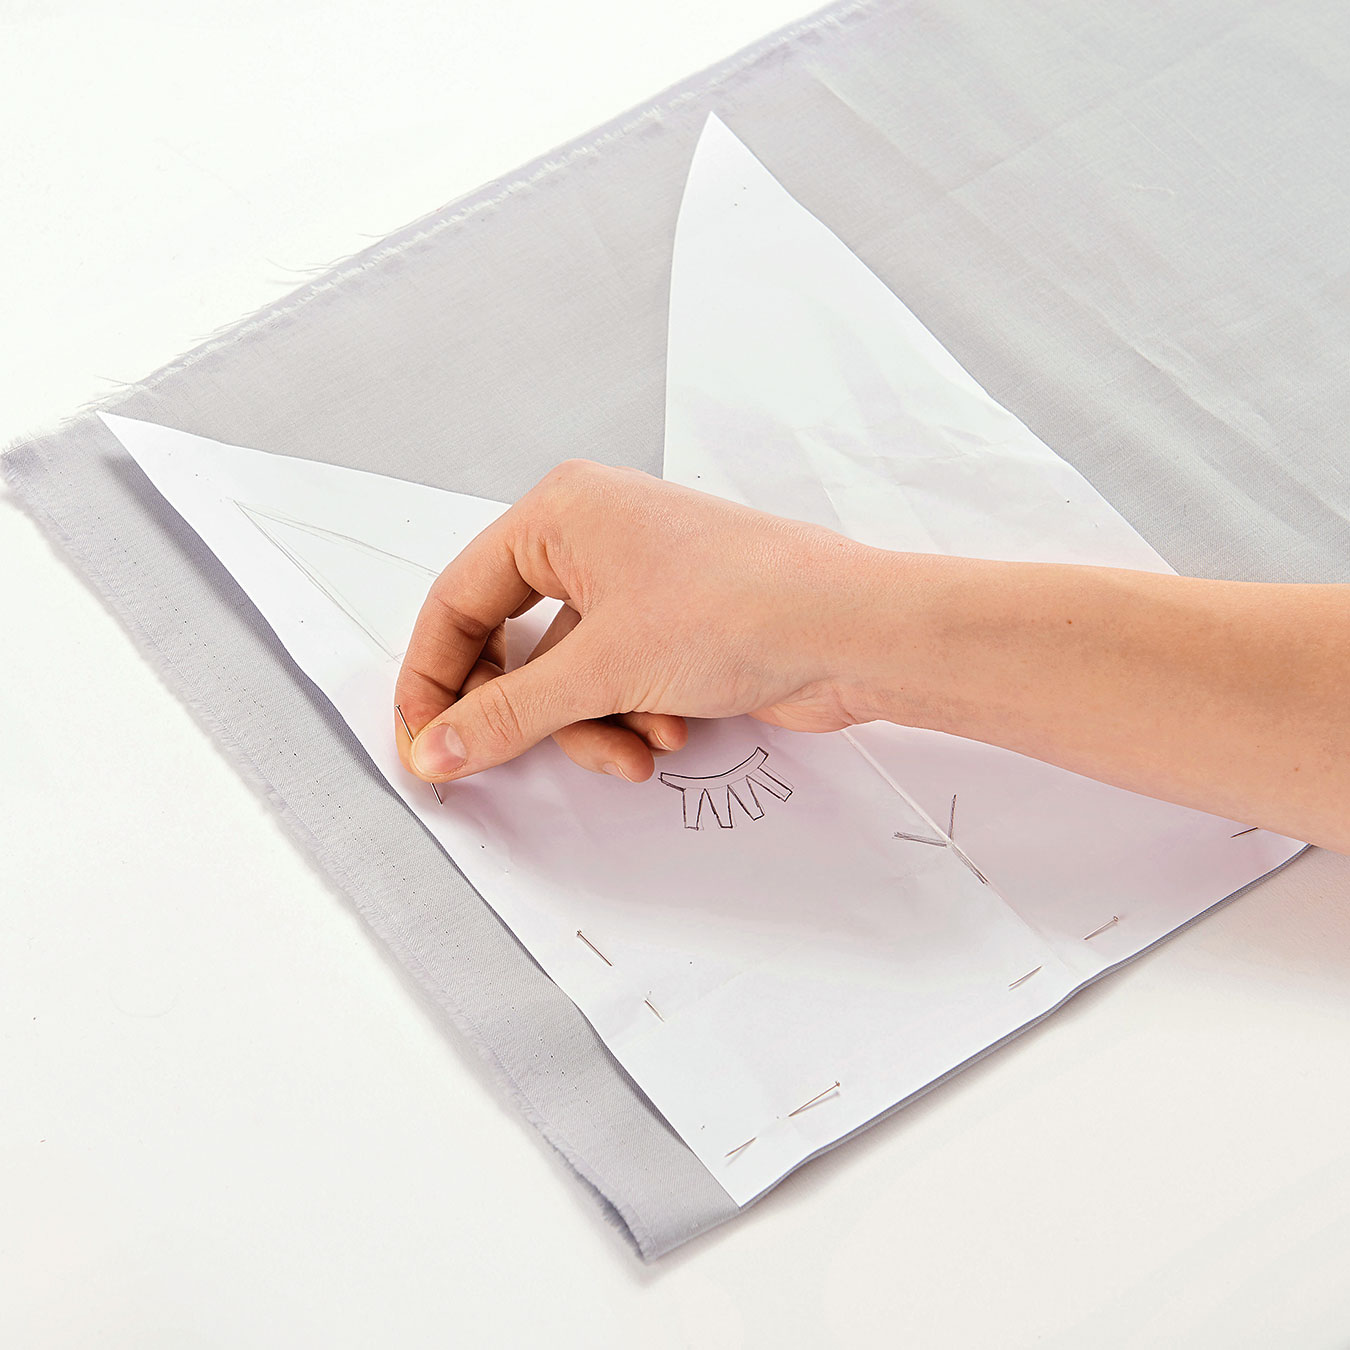
Pin the pattern onto the folded gray fabric.
STEP 2
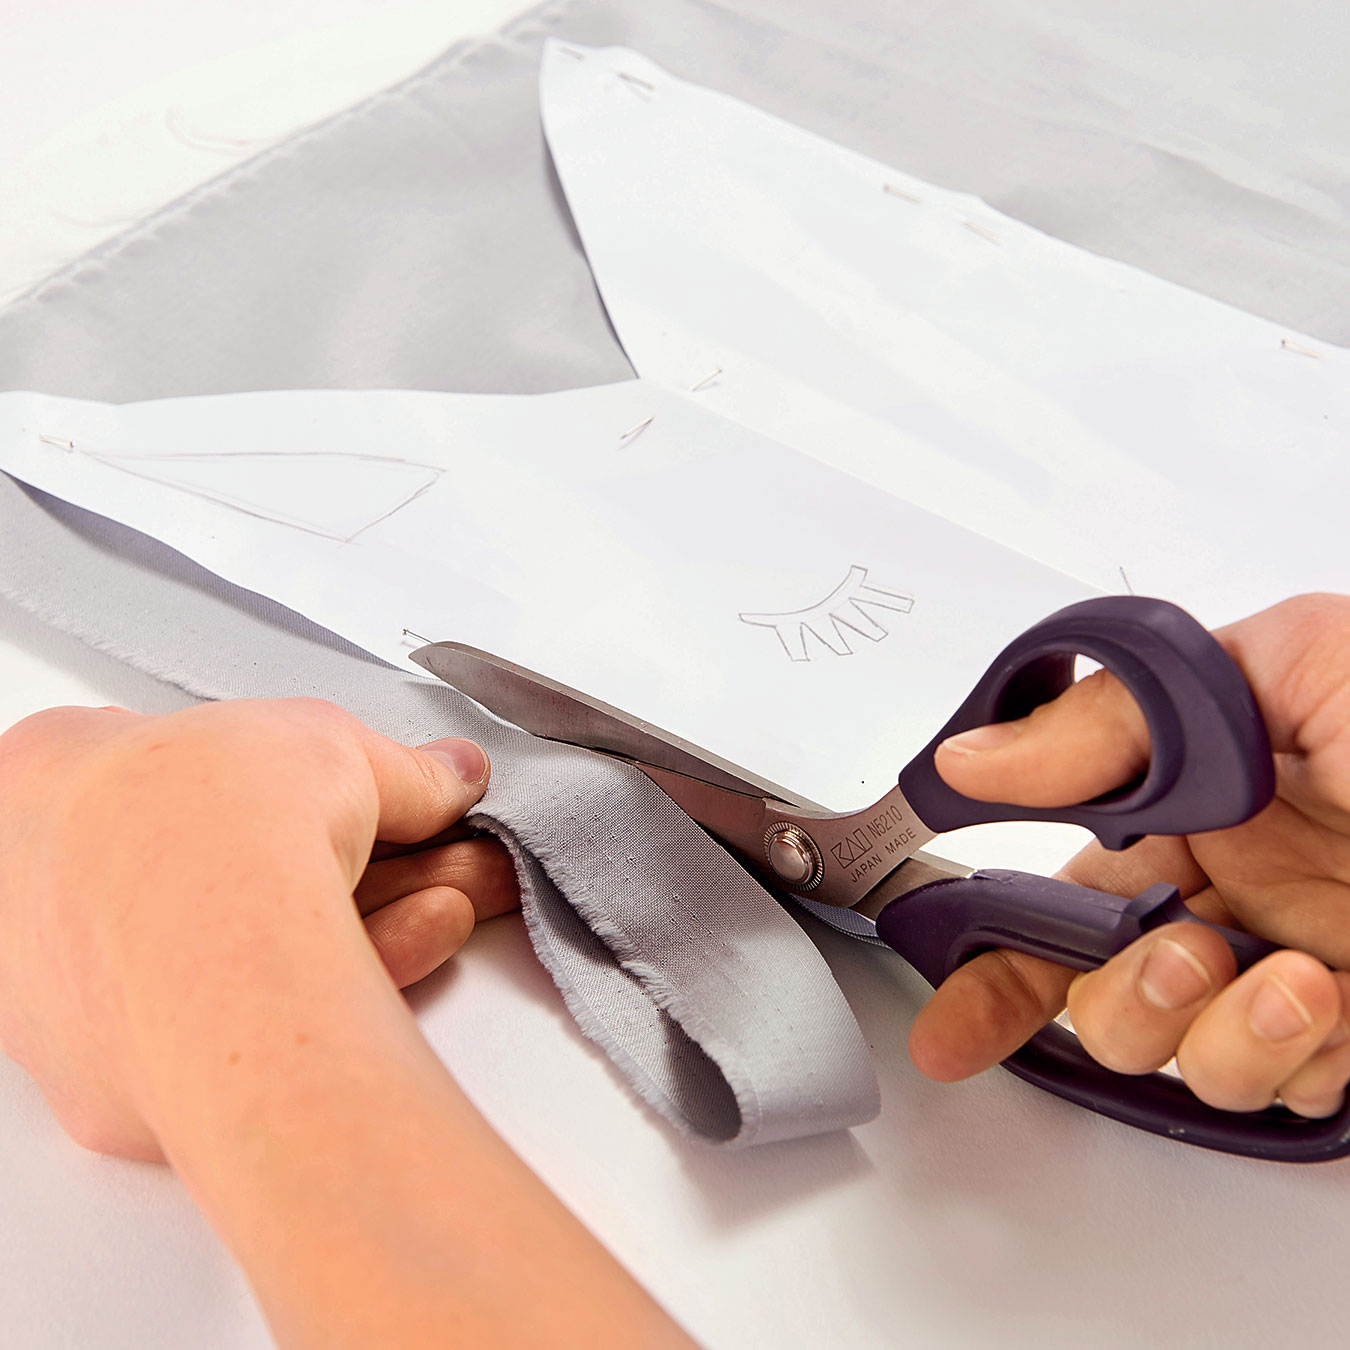
Cut along the edge without adding any seam allowance.
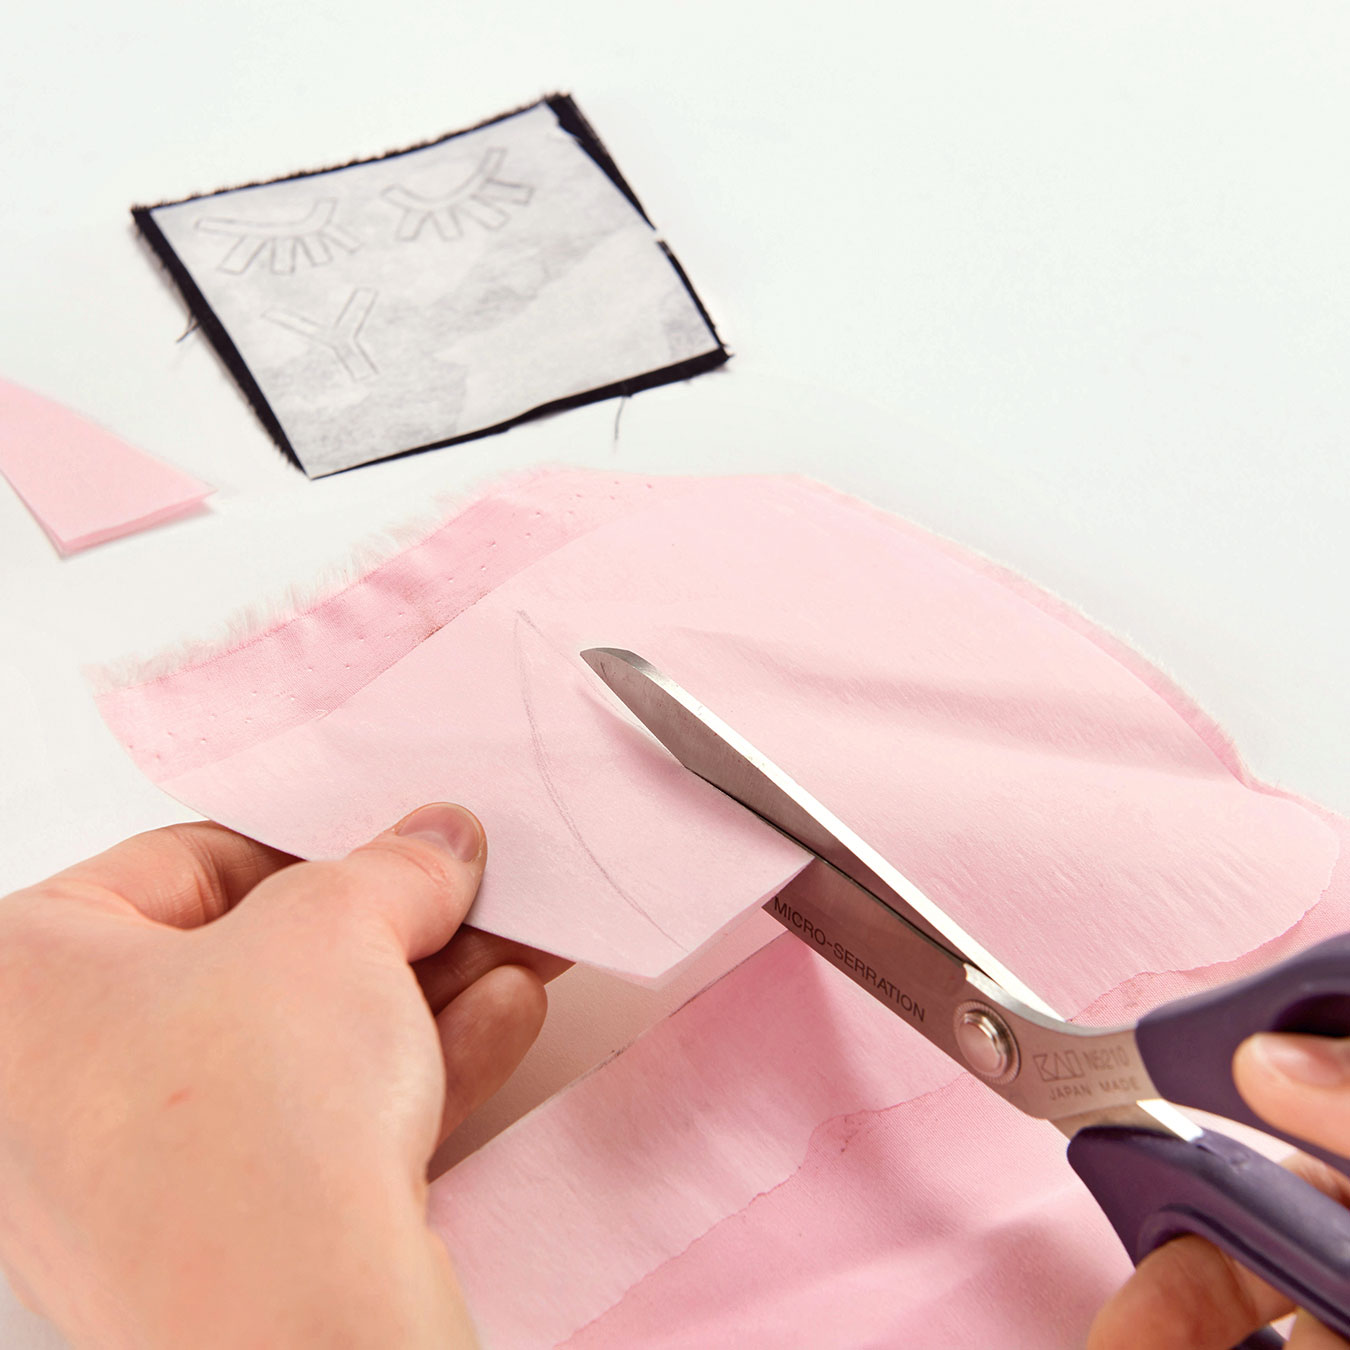
ÉTAPE 3
Fuse the Vliesofix onto the pink and black fabrics. Transfer the outlines of the eyes, nose, and ears onto the fabric using the pencil, then cut them out.
STEP 4
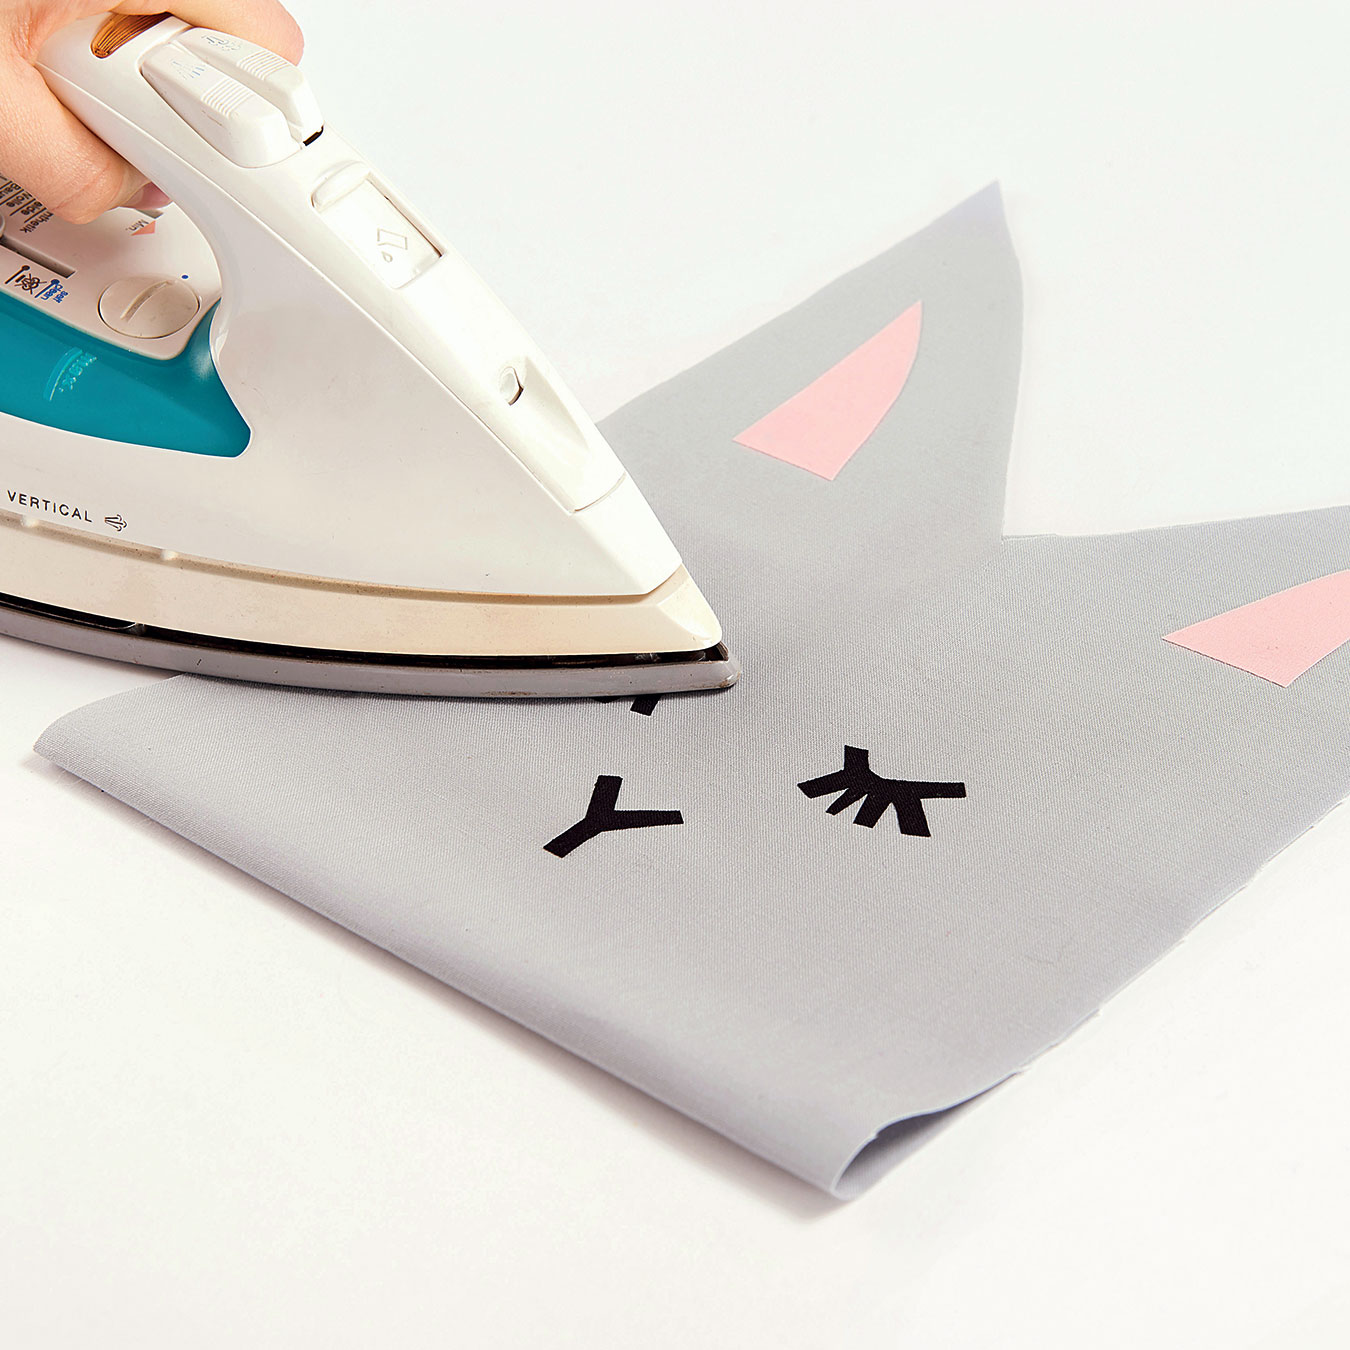
Fuse the eyes, nose, and ears onto the front of the pouch, placing them in their respective positions.

ÉTAPE 5
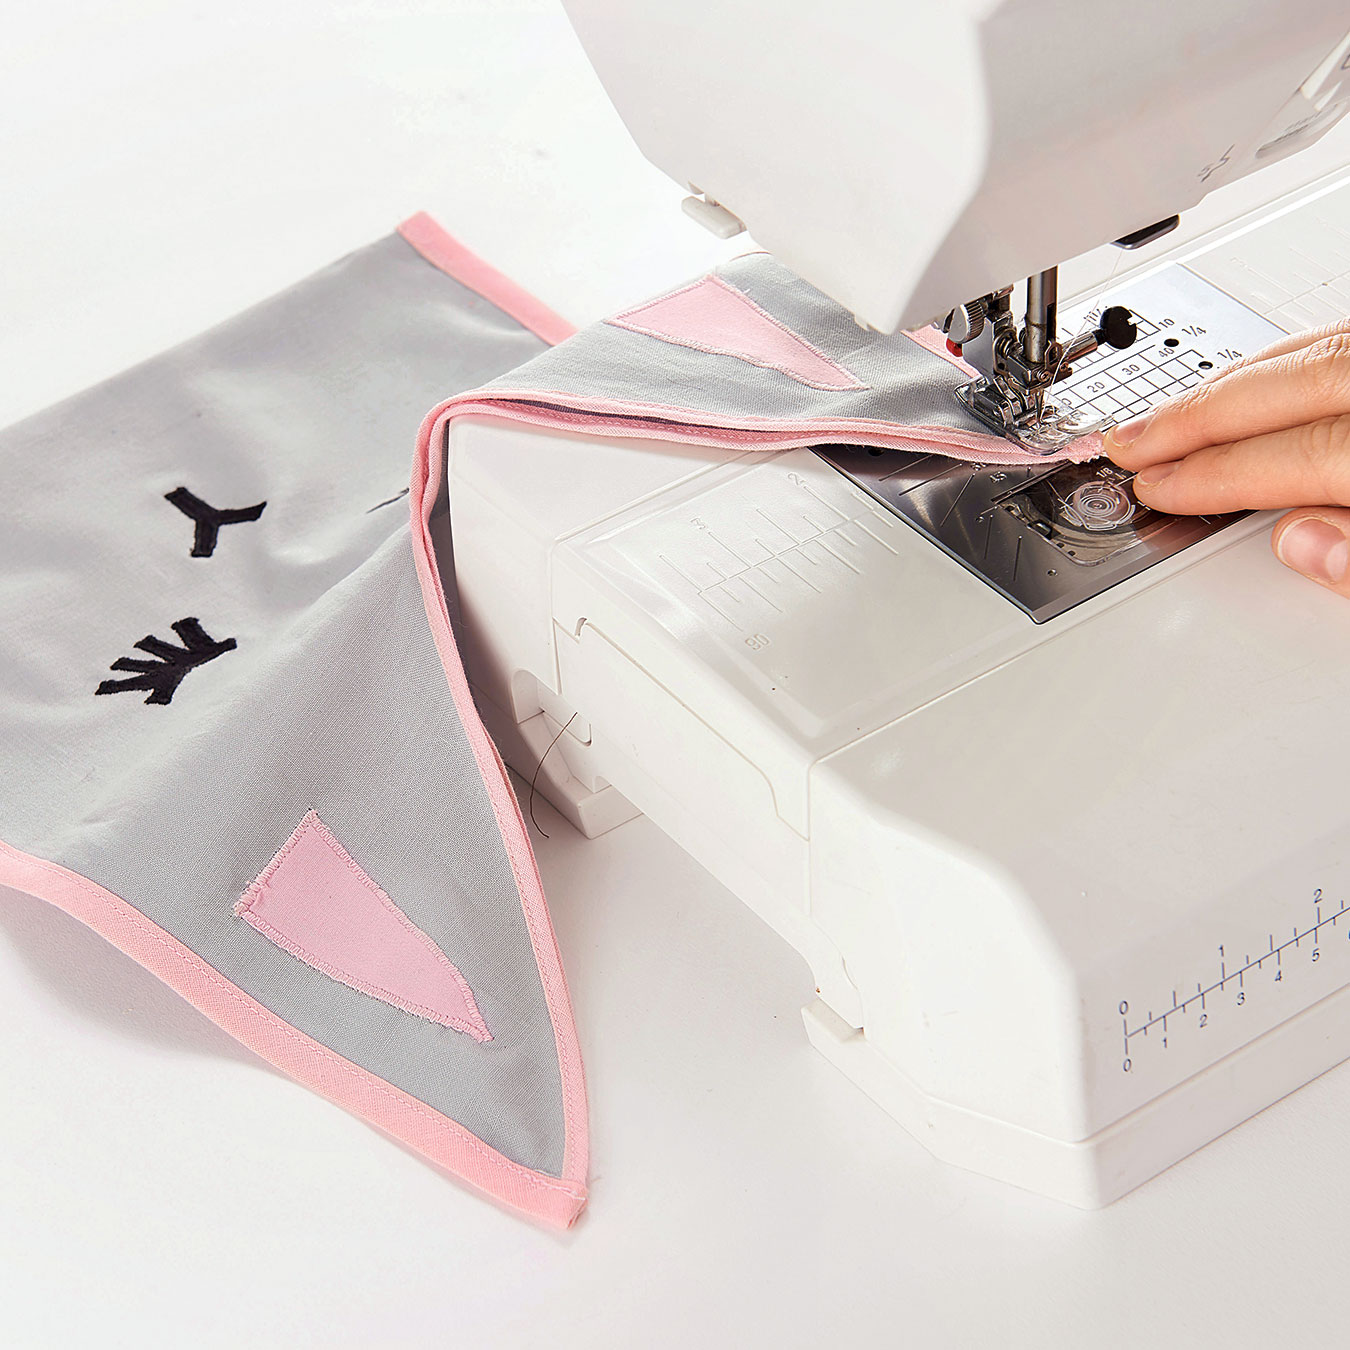
Sew the ears, eyes, and nose in place with small zigzag stitches. Be careful not to forget to unfold the pouch!
STEP 6
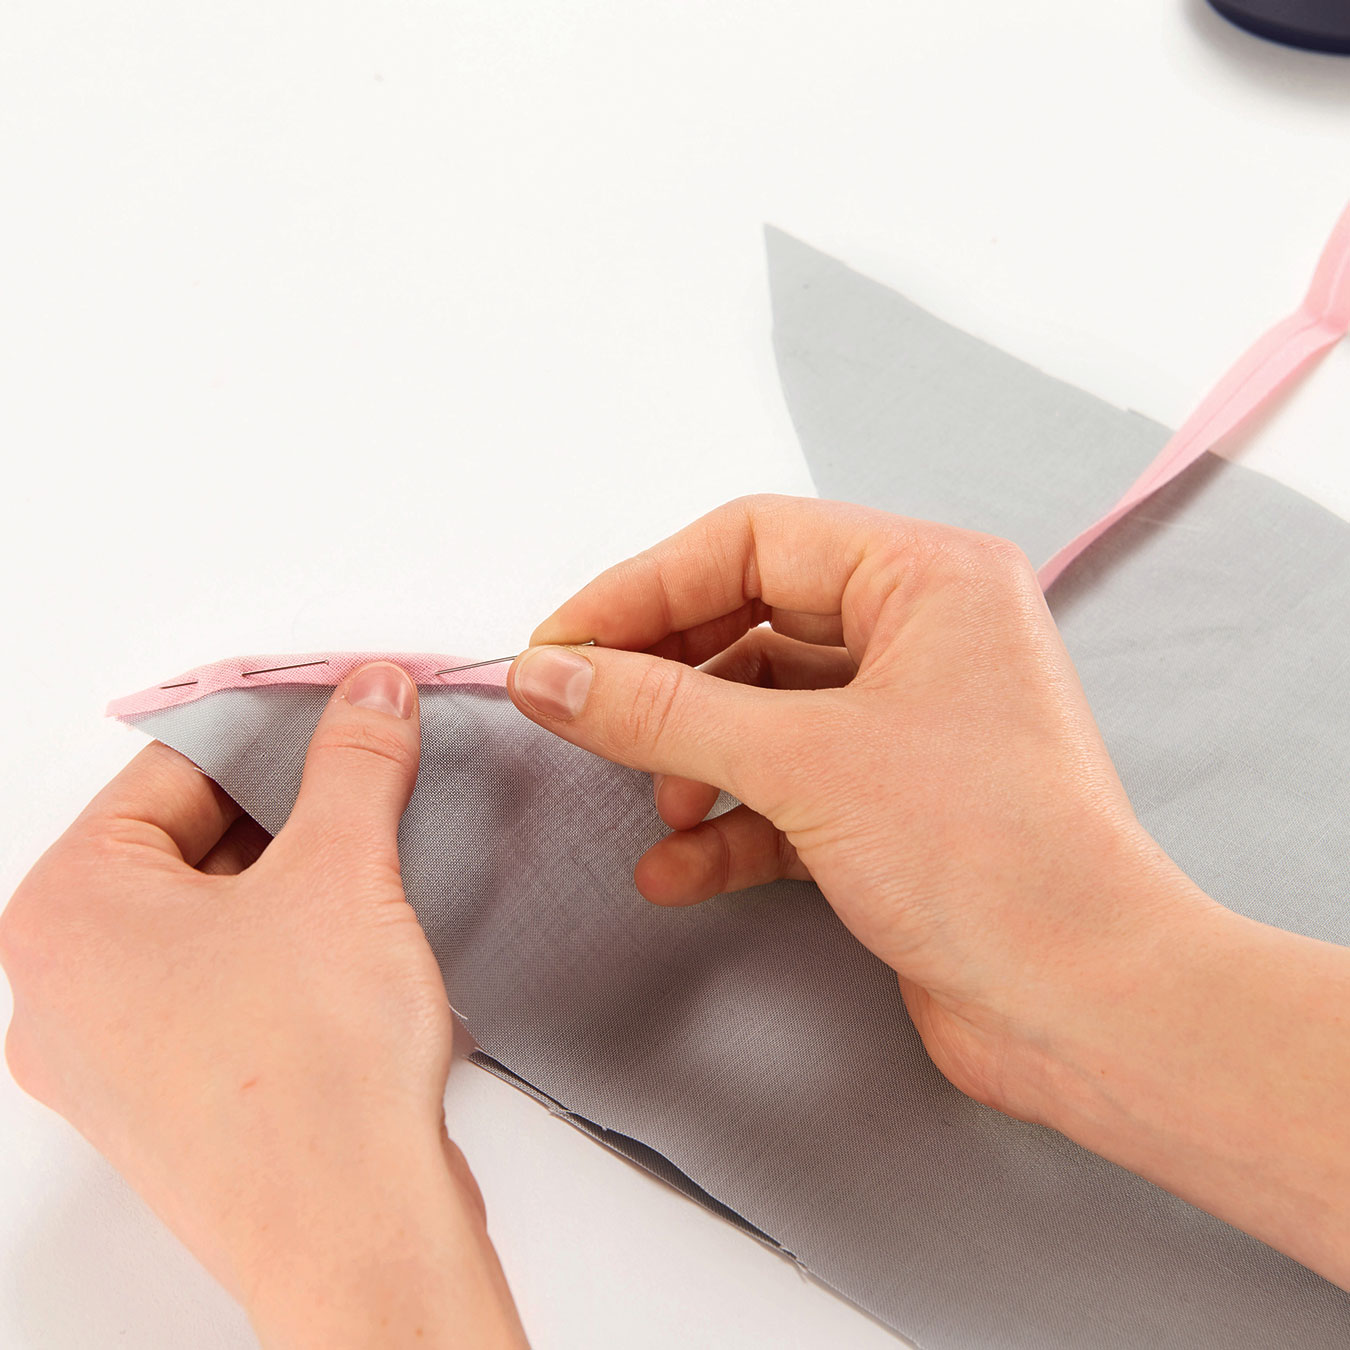
At the top, on the edge of the ears, pin the narrow bias tape to both sides of the triangle and sew in place.
STEP 7
Fold the pouch and bind its side seams with the wide bias tape.
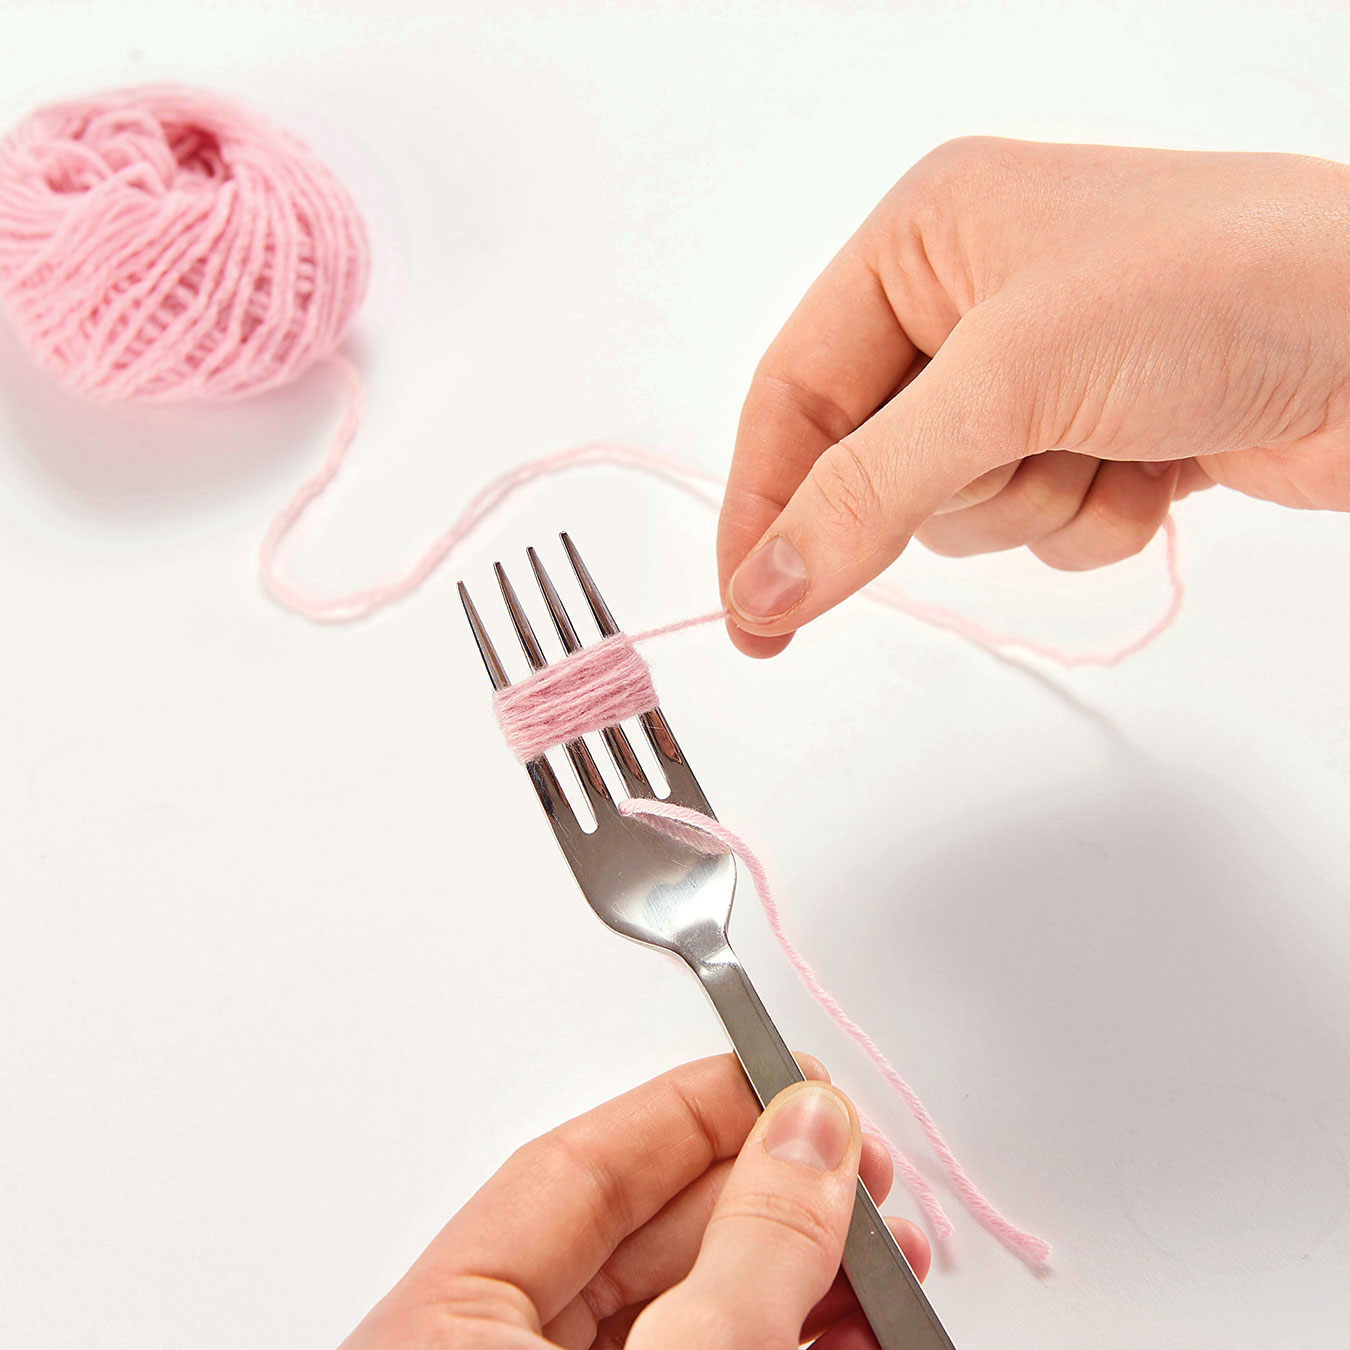
ÉTAPE 8
For the pompon, place a small piece of yarn in the middle of the fork and wrap it several times around the fork.
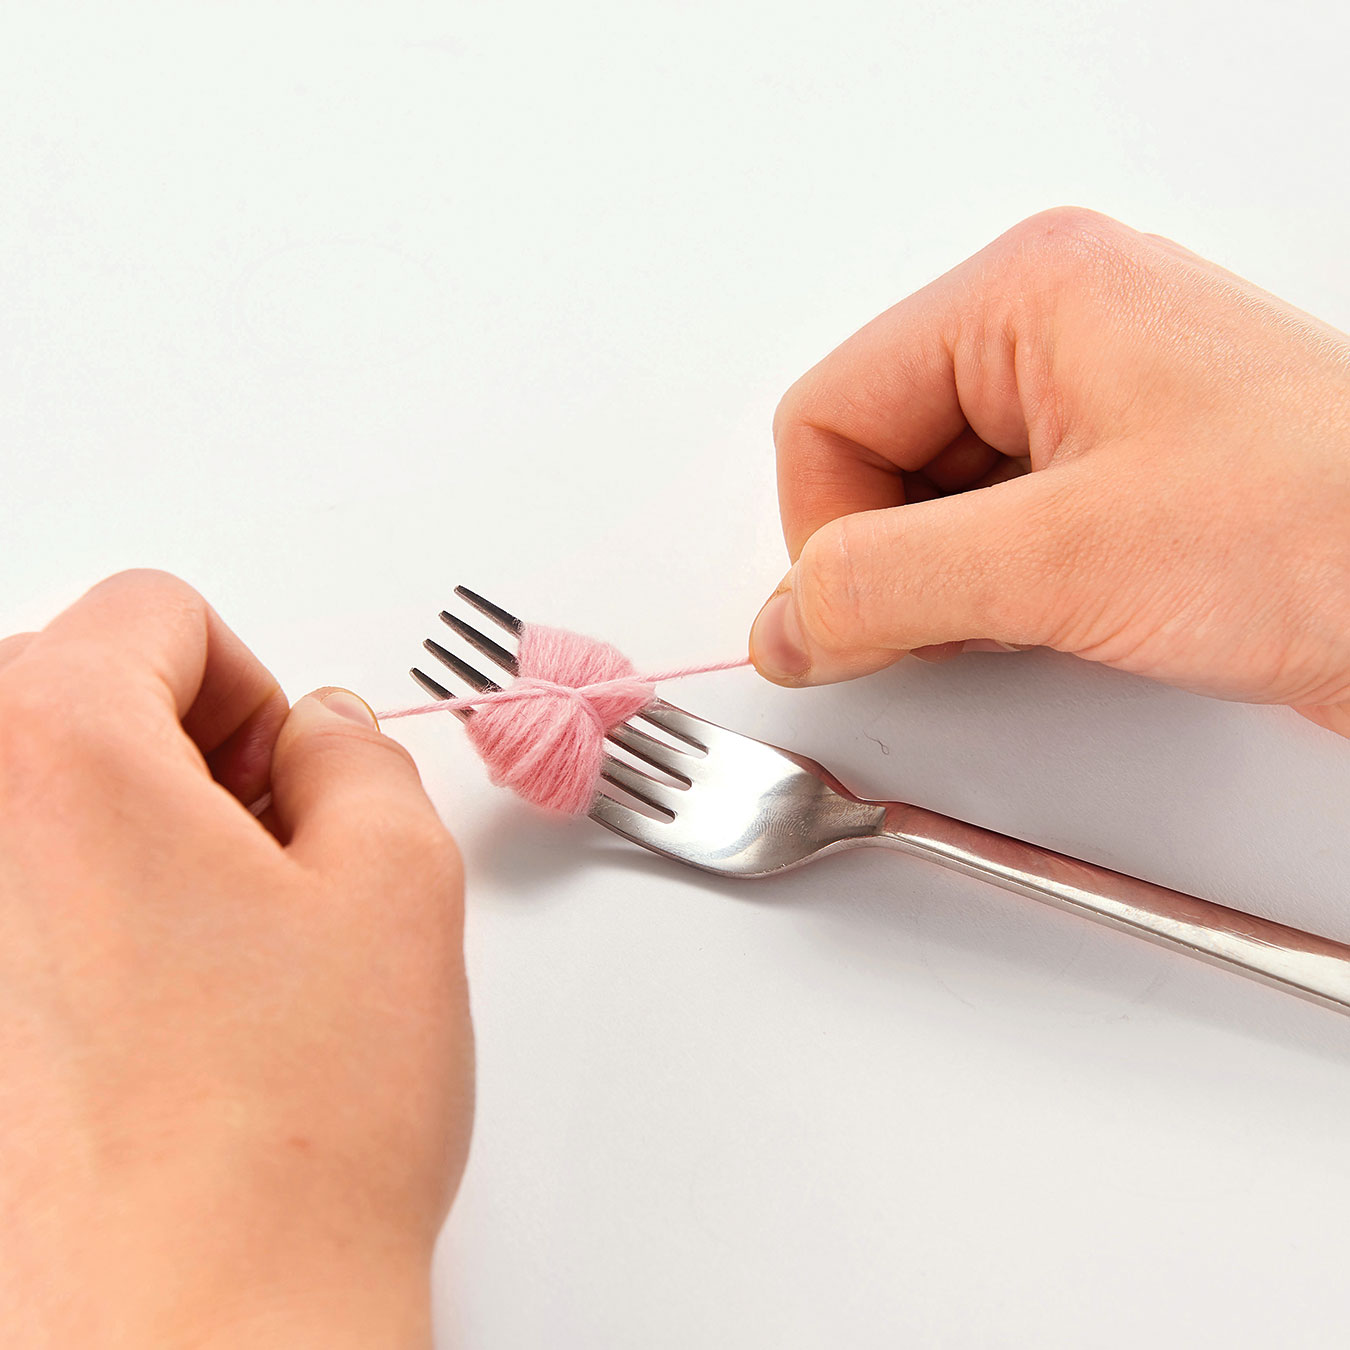
STEP 9
Tie a small piece of yarn tightly in the middle of the yarn you just wrapped around the fork.
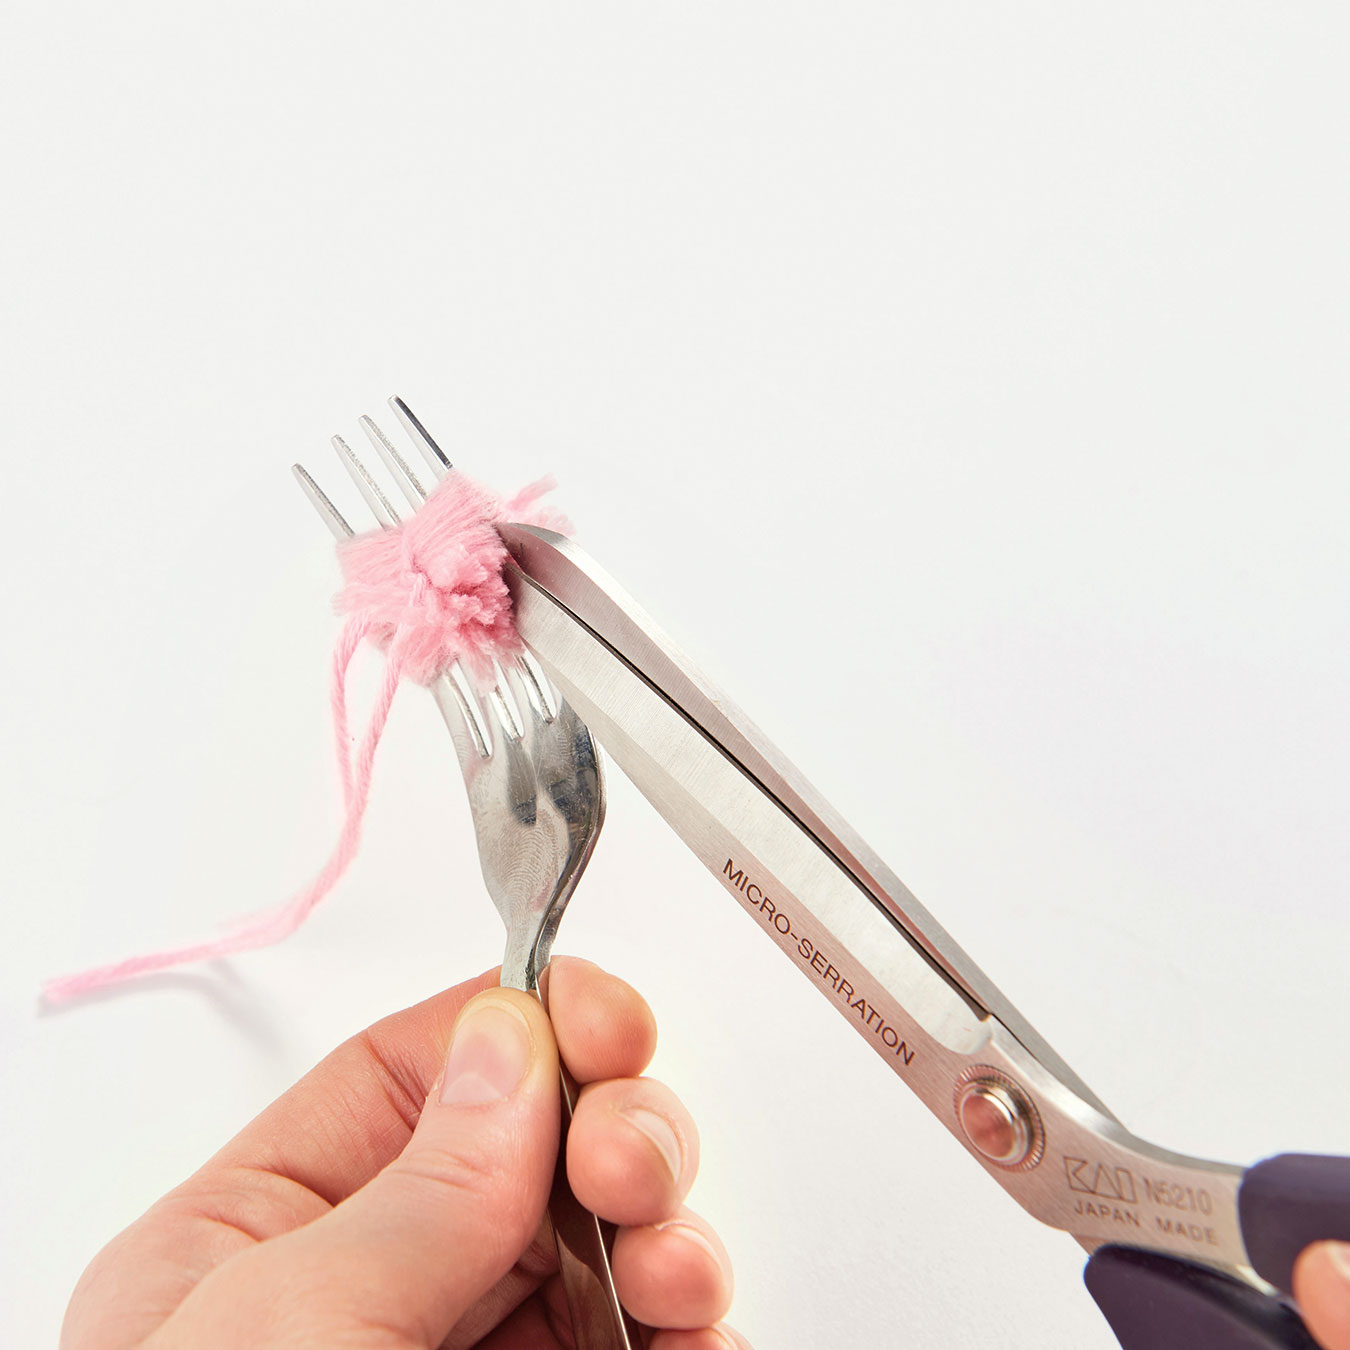
ÉTAPE 10
Cut both ends of the yarn along the sides of the fork.
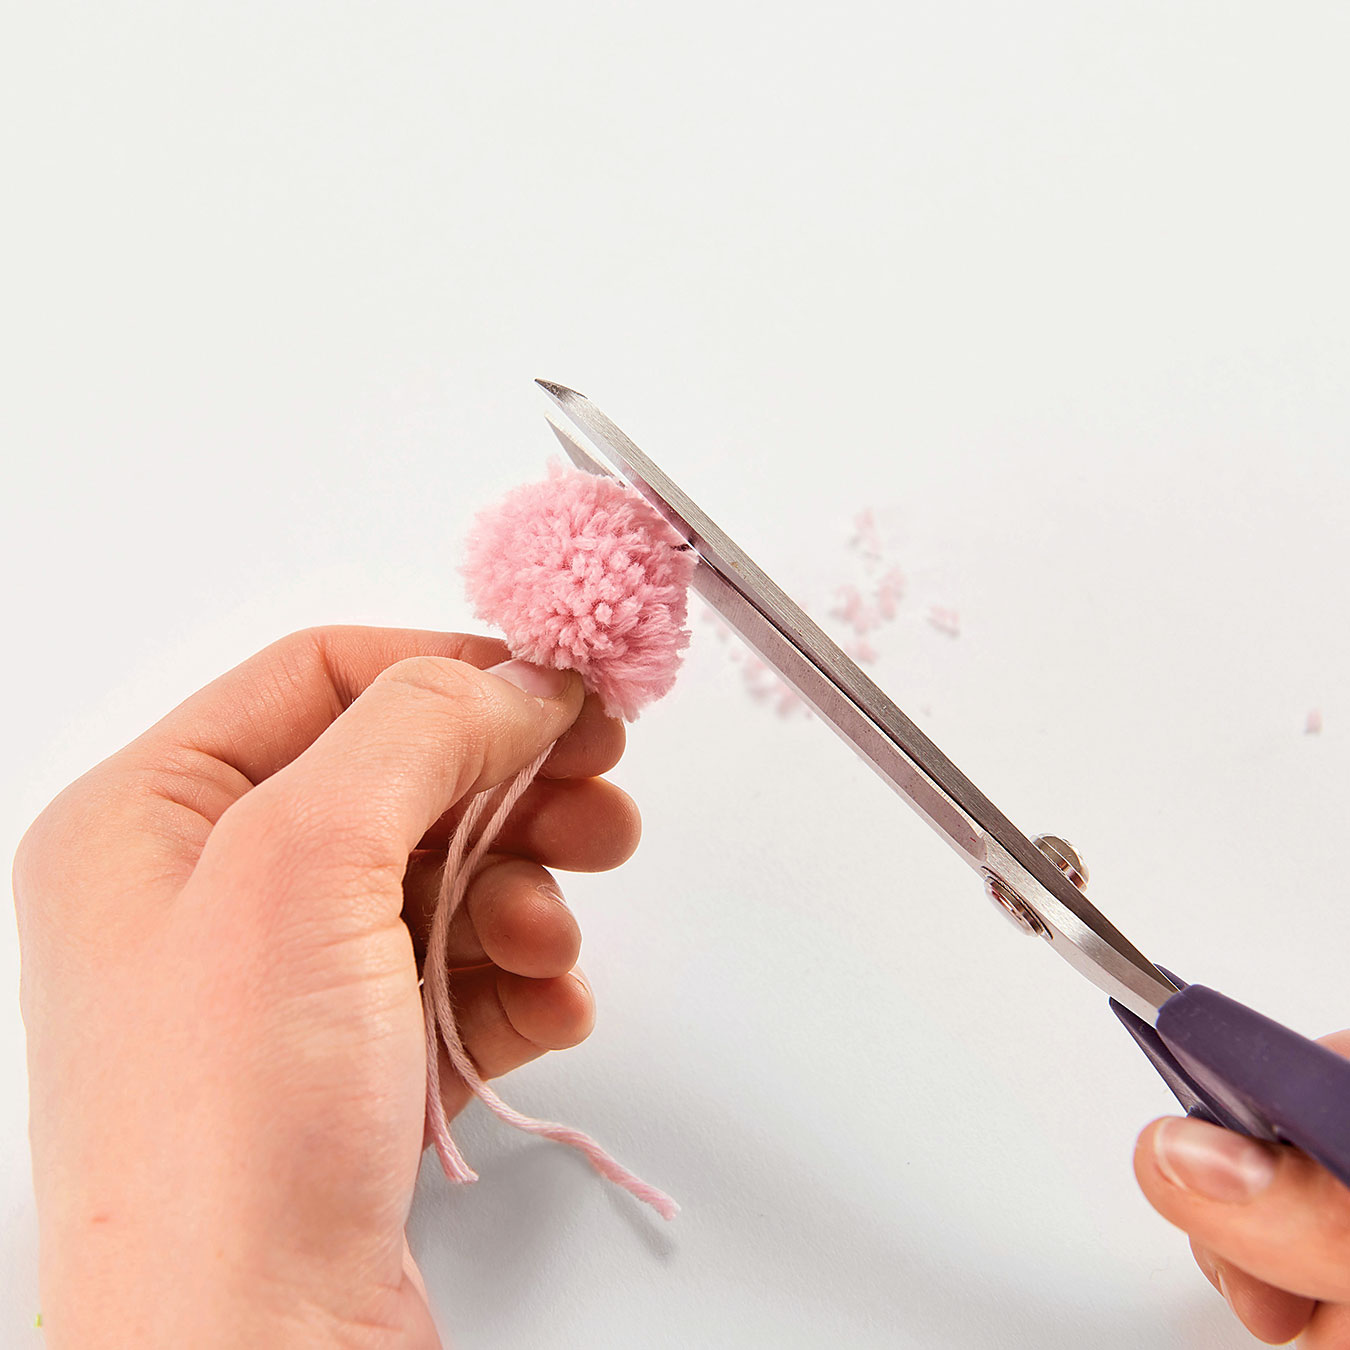
STEP 11
Trim the pompom to even out its shape by cutting it uniformly all around, then sew it by hand onto the back of the little bunny.
It's finished!

And there you have it! You now know how to create this adorable bunny-shaped gift pouch, both original and easy to sew. This is a fun, creative project that will make a difference on your Easter table or as a thoughtful gift wrap. Feel free to experiment with fabrics, colors, and finishes to personalize each bunny to your liking.
And if you'd like to access the instructions for this DIY in PDF format or print it to complete the project later, feel free to download it for free by clicking on the button below:
