Made with love! It applies to the best cakes – and also to this wonderful apron with lovely details.
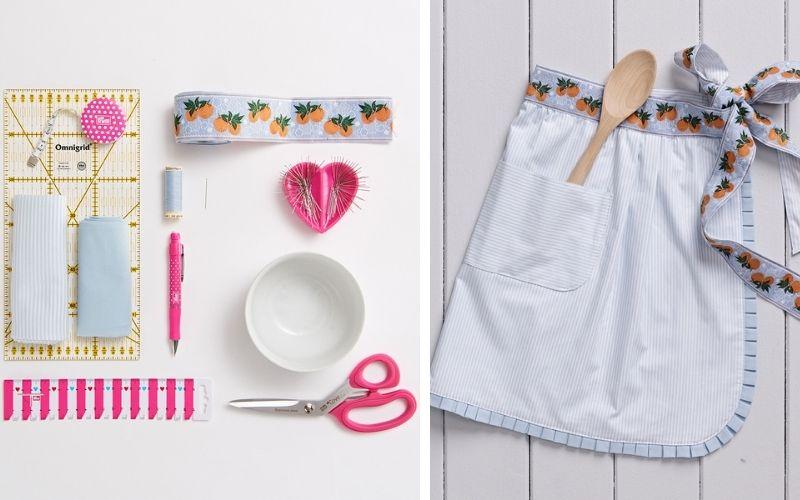
Materials

Poplin fabric
2 m jacquard ribbon
‘Oranges’ trim: 5 cm wide
Thread
Patchwork ruler
Tape measure
Seam gauge
Chalk pen
Scissors
Straight pins
Sewing needle
Bowl/plate
Template and diagram (measurements in cm)
Step 1

Cut out from striped cotton: 2x apron (see diagram in template), 2x pocket.
Step 2

Round off the two lower edges of the apron with the help of a bowl or a plate.
Step 3

Apron: Stitch the two cut pieces to each other at the sides and bottom, right sides together, with a 1 cm (3/8 in) seam allowance. Trim the seam allowance to approx. 3 mm (1/8 in).
Step 4

Place pockets right sides together. and stitch, leaving an opening at the top for turning inside out. Trim seam allowance, turn inside out and topstitch the upper edge close to the edge.
Step 5

Pin the pocket to the apron (see dia-gram) and stitch close to the edges. Now stitch down the centre of the panel seam.
Step 6

Create the 4 folds in the apron (see diagram) and stitch to fix them in place
Step 7

Cut out the pleated trim (pleat guide in template) to approx. 350 cm on the fold (extend/sew together 1-2 times if necessary).
Step 8

Mark the folds, press and pin. Stitch 2 cm (3/4 in) from the folded edge and neaten with the overlock (finished width of pleated trim: 3 cm (1 1/4 in).
Step 9

Stitch the pleated trim edge to the apron close to the edge, making sure that 1.5 cm (5/8 in) remains visible later.
Step 10

Make 2 rows of gathering stitches along the top edge of the apron and gather evenly to a total length of 50 cm (19 3/4 in).
Step 11

Cut a 2 m (78 3/4 in) length of trim, cut a 2 cm (3/4 in) diagonal from the ends and press 1 cm (3/8 in) to the inside. Pin to the apron and stitch close to the edge.
Step 12

Cut out fabric strips (200 x 7 cm (78 3/4 x 2 3/4 in)) and fold 1 cm (3/8 in) to the inside on all sides and press (also press edge ends to inside as in step 12) and pin to the jacquard trim.
Step 13

Stitch the protruding edges at the top and sides close to the edge from the wrong side. Sew the tie to the inside of the apron by hand.
Step 13
Stitch the protruding edges at the top and sides close to the edge from the wrong side. Sew the tie to the inside of the apron by hand.
Finished

Short & sweet - and will protect your clothes underneath!
Perfect kitchen companion

This is the perfect use of vintage trim for the waist band. If you are a beginner sewist, try omitting the pleated trim.