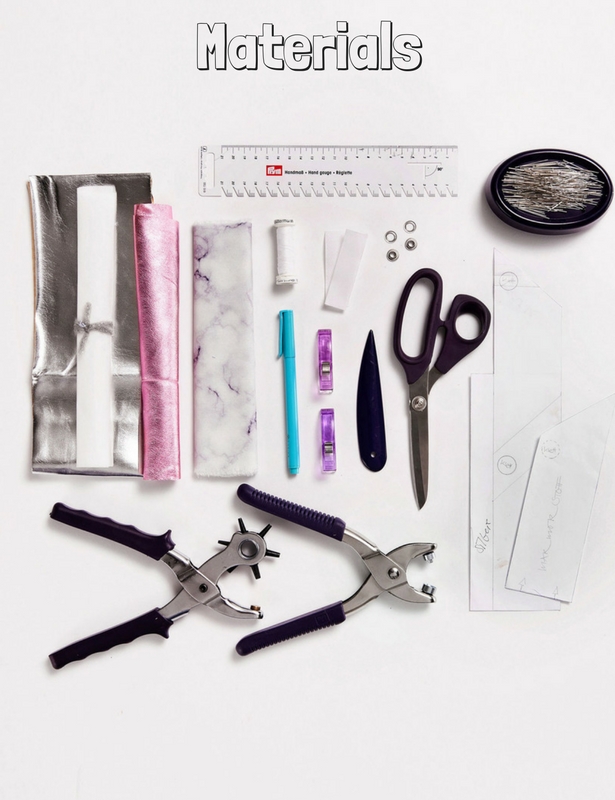
+ Silver faux leather + Pink leather + Marbled cotton fabric + Bondaweb fusible web (Vilene) + Thread + Pen + Clips + Ruler + Metal eyelets + Hook-and-loop tape + Corner and edge shaper + Scissors + Straight pins + Hole punch + Eyelet pliers + Pattern

Step 1: Cut the pattern piece from fusible web, without seam allowances. Iron this piece to wrong side of the silver faux leather. Step 2: Cut the leather exactly along the edges of the fusible web piece.

Step 3: Peel paper backing from the fusible web. Step 4: From the hook-and-loop tape, cut a circle, approx. 1.5 cm (5/8") in diameter. Separate the hook and loop circles.

Step 5: Stitch one of the circles of hook-and-loop tape to the leather with fusible web, as marked, stitching around the entire circle edge. Step 6: Iron silver piece to wrong side of pink leather, using a pressing cloth. Cut pink leather exactly along edges of silver leather.
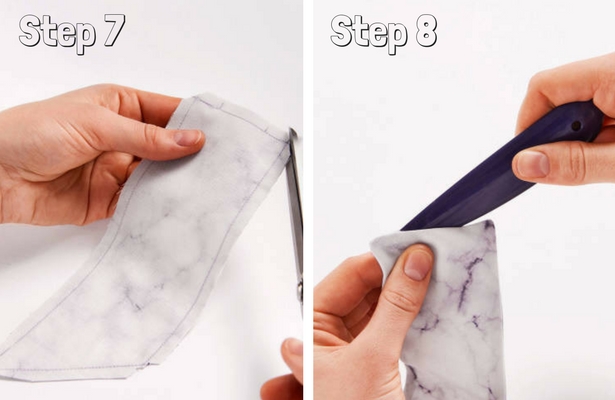
Step 7: For the pocket, cut 2 pieces of cotton fabric, adding 0.5 cm (3/16") wide seam allowances. Stitch pieces together, right sides facing, leaving 3 cm (1 1/4") open on lower edge. Trim corners diagonally. Step 8: Turn pocket piece right side out and make sharp edges and corners, with the help of the shaping tool.

Step 9: Stitch remaining circle of hook-and-loop tape to pocket piece, as marked. Topstitch close to upper angled edge of pocket piece. Step 10: Lay pocket piece on silver side of leather and clip in place. Edgestitch side and lower pocket edges to leather and also topstitch close to remaining leather edges.

Step 11: Lay pencil case next to rings of planner and mark positions of eyelets. Step 12: Punch holes as marked
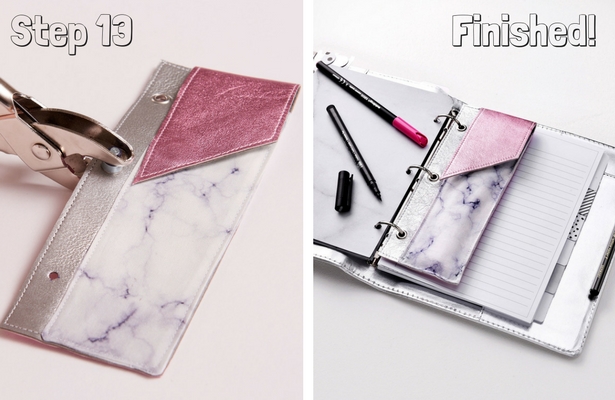
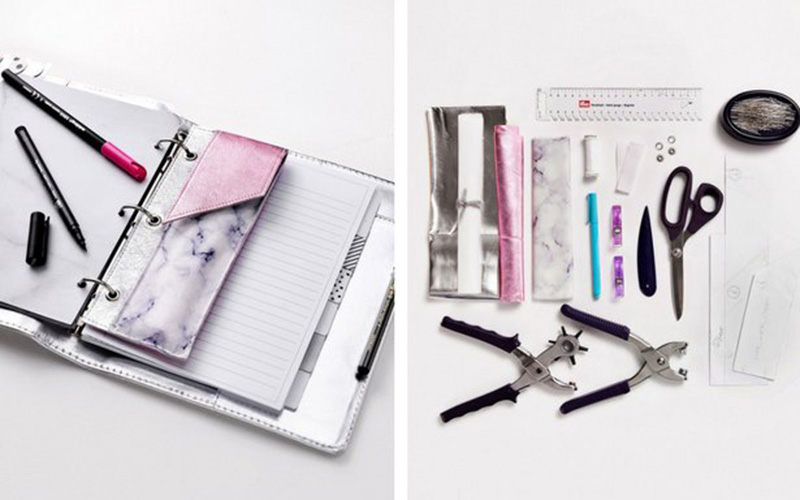
Step 13: Insert metal eyelets in holes and attach with the help of the eyelet pliers. FINISHED! Add to your planner and fill with all your favorite pens and pencils.