Among the refined details that elevate a well-crafted blouse, the sleeve placket—especially the classic tower placket—stands out for its neatness and understated charm. Though it may seem daunting at first, mastering this technique adds finesse and functionality to your garments.
Let’s explore how to construct this elegant opening with clarity and confidence.
✄ - - - - - - - - - - - - - - - - - - - - - - - - - - - - - - - - - - - - - - -- - - - - -
The Classic Shirt Sleeve Placket
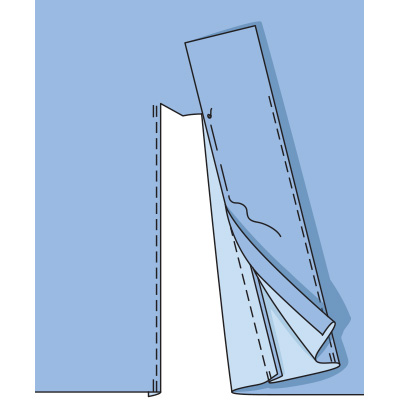
For this placket, the cuff ends with the placket edges. It is important that the placket on the right and left sleeves mirror each other. Remember that the slashed edge that is closest to the sleeve seam is the underlap.

To make a sleeve placket, all you have to do is follow these five simple steps:
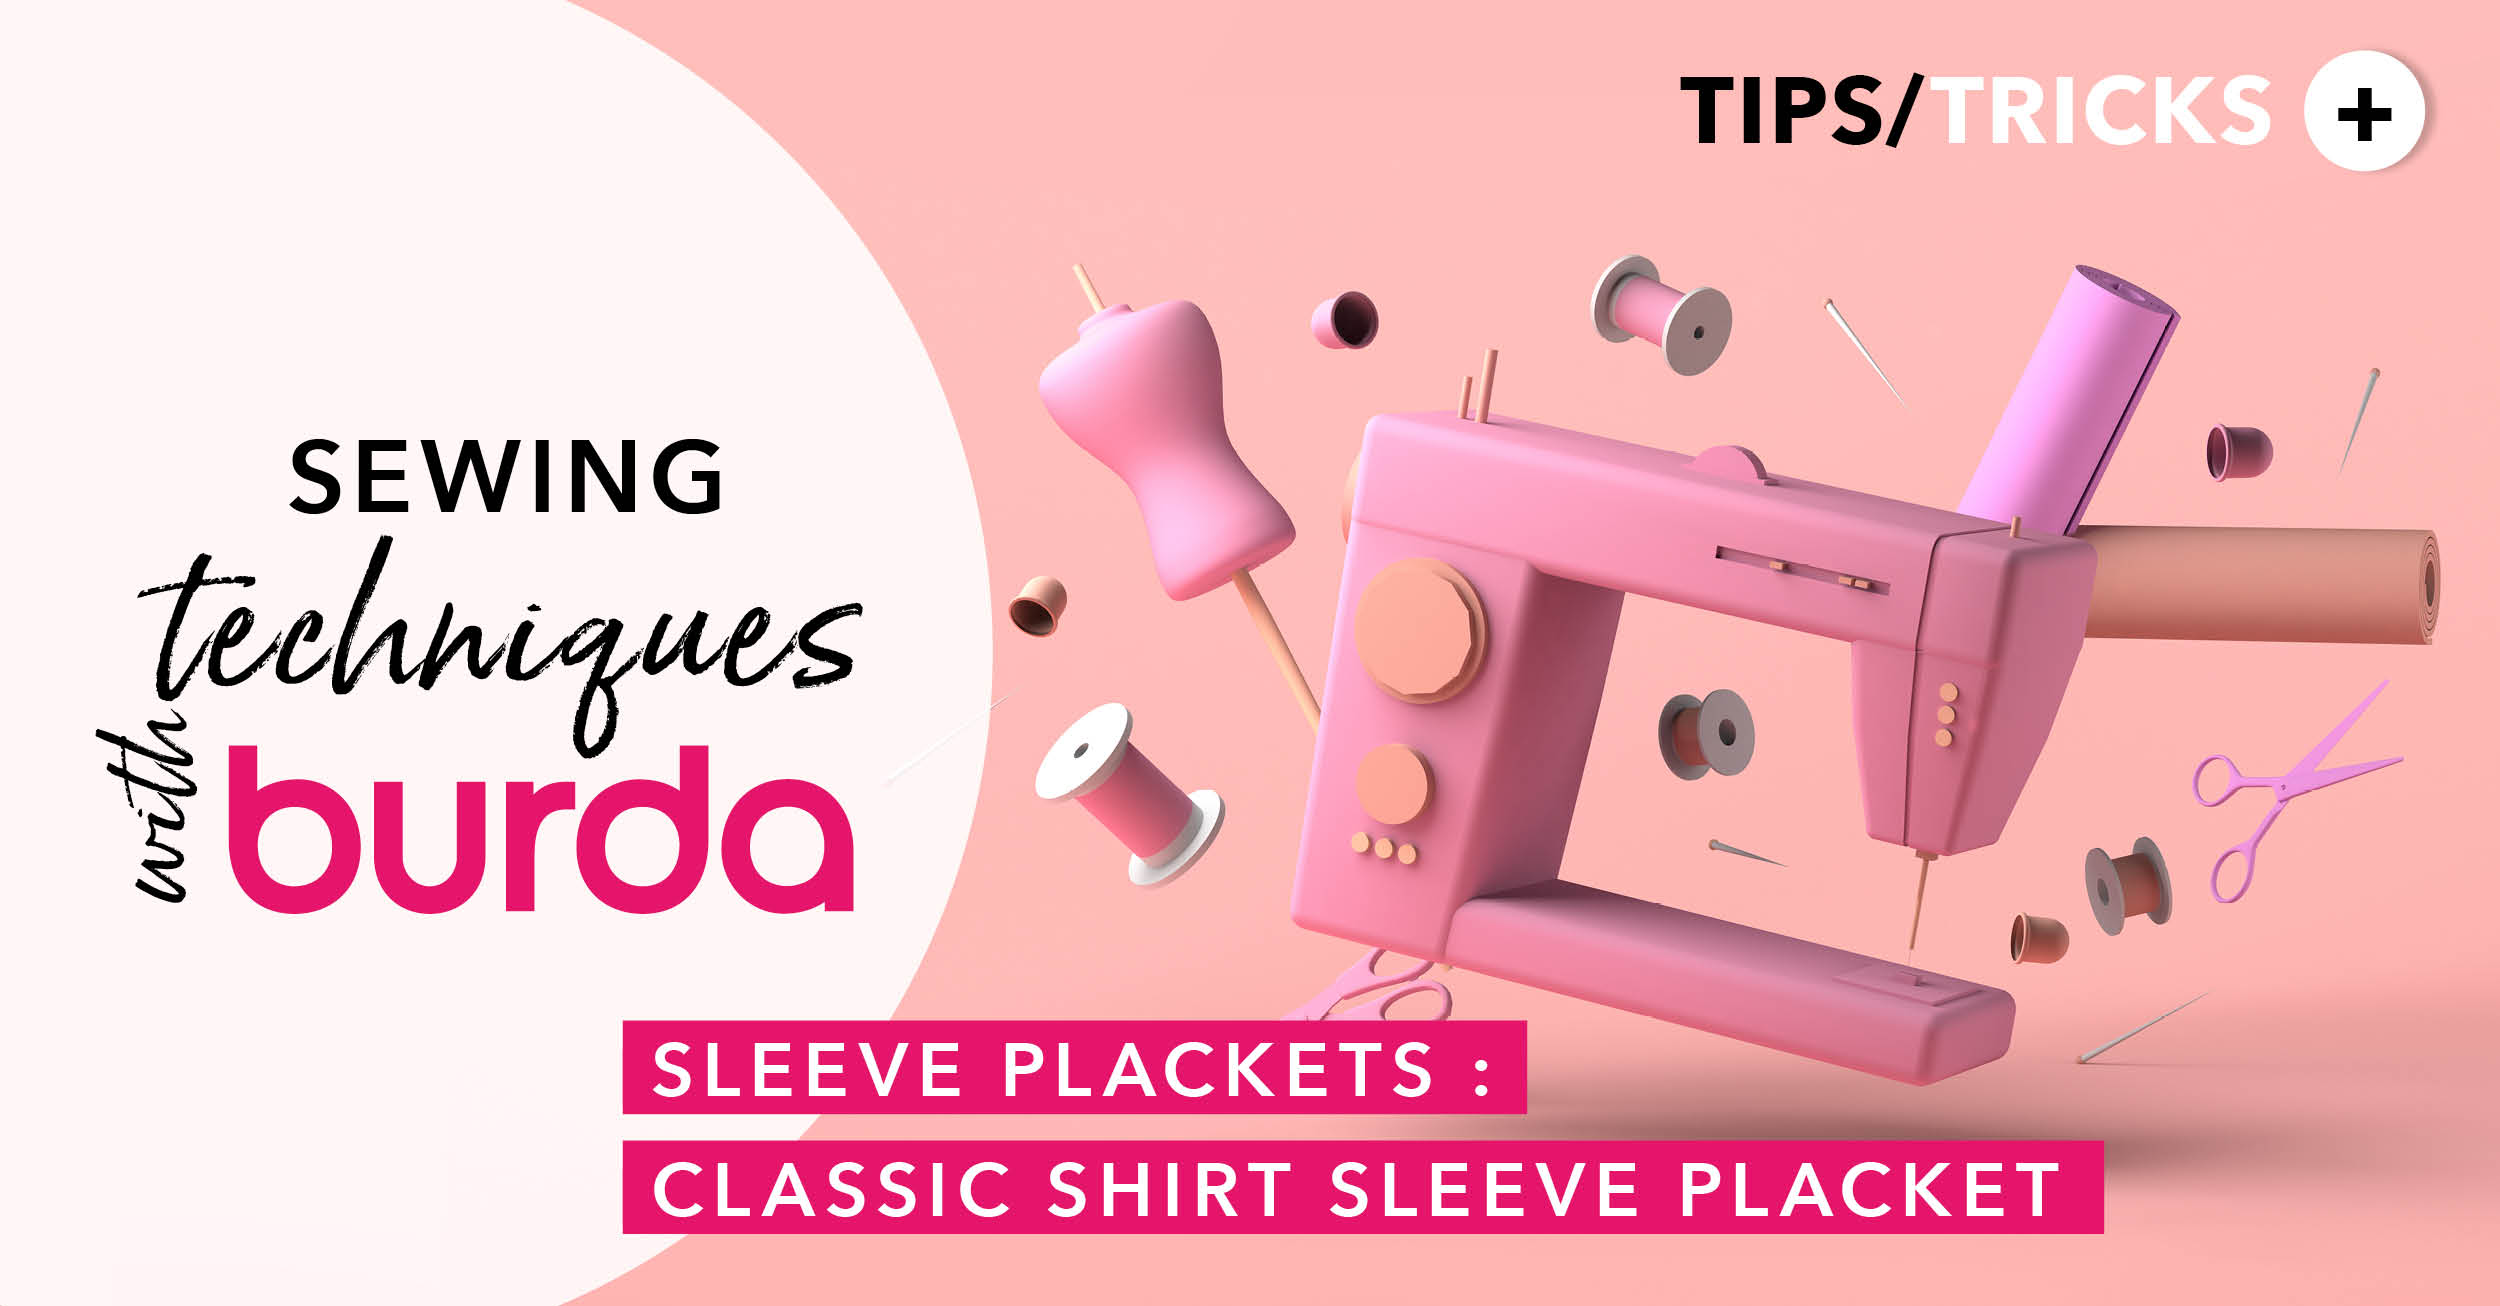
1. For the band, cut out a strip of fabric on the straight grain: 2 x the band width plus seam allowance and approx. 5 cm (2 in) longer than the marked slash line.
Slash the sleeve along the marked slash line and, for the underlap, slash ½ cm (1/4 in) at the placket end. Fold under the placket edge for the underlap twice (making it as narrow as possible) and stitch.
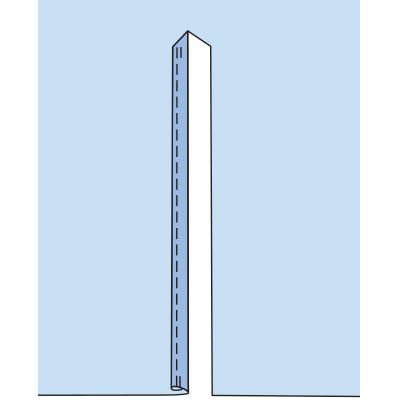
2. Fold the band lengthwise, right sides together. Stitch the top edges together close to the edge, making the required band width, and continue stitching the long edges together 3 cm (1 1/4 in). Secure the seam ends.
Clip up to the last stitch and trim the seam allowances.
3. Turn the band inside out, press.
From the bottom, topstitch the fold close to the edge up to 3 cm (1 1/4 in) away from the band end.
Stitch the outer band half right sides together, close to the front (raw) slashed edge.
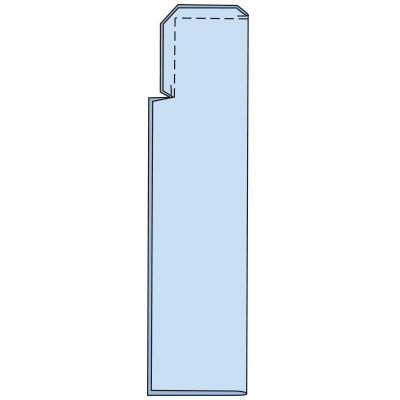
4. At the seam end, clip the seam allowance of the sleeve up to the last stitch.
Press the seam allowances into the band.
Fold the inner band half and baste to the joining seam.

5. From the right sleeve side, topstitch the band to the joining seam close to the edge, catching the inner half.
Continuing on, stitch the top band end to the sleeve close to the edge, and then topstitch the band in an X to reinforce the placket end.
Important: The drawings show the shirt sleeve placket for the right sleeve. Mirror the placket on the left sleeve.
By following each step carefully and making sure to create a clean finish, you’ll create a placket worthy of the finest tailored shirts. It's a small touch that makes a big difference, for a look that is refined, practical, and stylish. On your mark, get set, sew!
And to find all the sewing basics and beginner-friendly patterns in one single book:
