What are plackets? In the world of sewing, they are discreet openings that add both comfort and elegance to our garments. Behind their apparent simplicity lie a variety of techniques, each adapted to different uses and cuts. Today, let’s dive into the precise and refined world of the reinforced placket.
On a sleeve, at the hem of a skirt, or at the back of a blouse, this finish creates a clean, edge-to-edge opening while invisibly reinforcing the fabric. It is especially appreciated for providing a durable and aesthetic seam without unwanted bulk.
Did you know that with just a few precise movements, you can master this technique even in your very first sewing projects? Here’s everything you need to know to create your first reinforced placket like a true professional!
✄ - - - - - - - - - - - - - - - - - - - - - - - - - - - - - - - - - - - - - - -- - - - - -
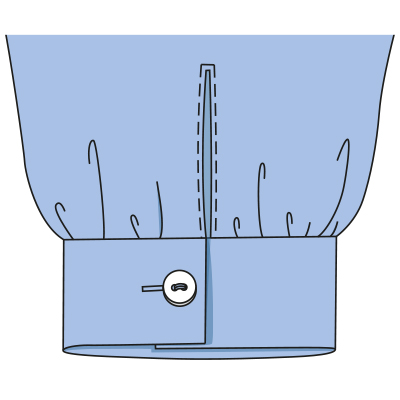
Reinforced placket
This placket finish is always used for cuffed sleeves if the placket edges do not overlap but only touch instead and the cuff does not end with the placket edges.
You can make a placket in just three simple steps:
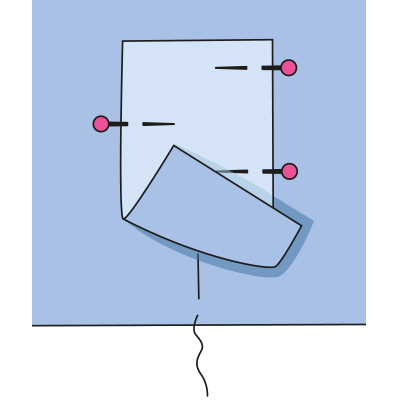
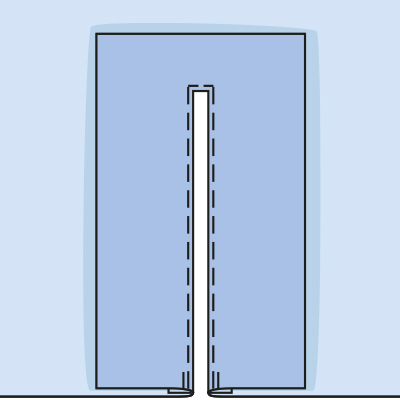
1. For the reinforcement, you will need one strip of fabric cut on the straight grain approx. 4 cm (1 5/8 in) wide and 4 cm
(1 5/8 in) longer than the finished placket. Sew a piece of basting thread along the marked slash line. Pin the strip of
fabric onto the slash marking, right sides together.
2. Stitch all around the slash marking from the wrong sleeve side, making 2–3 crosswise stitches at the top end. Slash
between the lines of stitching up to the placket end and clip the corners at an angle.
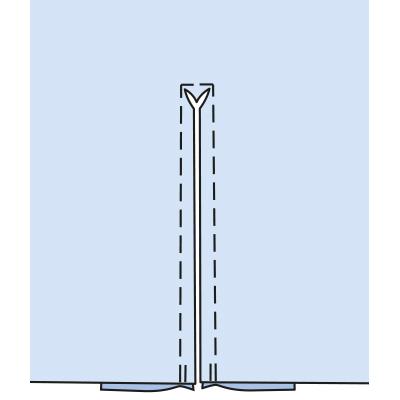
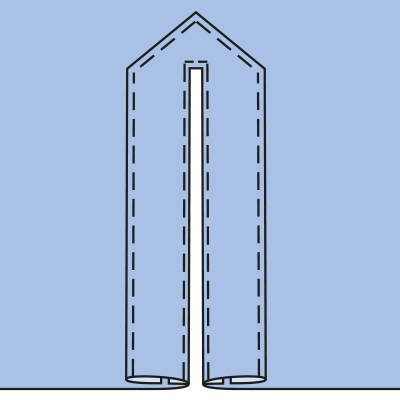
3. Fold and baste the fabric strip to the inside. Press the placket edges, topstitch close to the edge. Neaten the fabric
strip with zigzag stitches or fold it to the inside, pin and stitch close to the edge.
An attractive variant:
Turn the fabric strip into a band. Simply stitch the fabric strip with the right side facing the wrong side of the sleeve, clip, turn to the outside, fold and stitch.
The reinforced placket is a simple yet refined technique that instantly gives your creations a more professional look. With a little patience and the right moves, it will soon become second nature in your sewing projects!
So, ready to try it out on your next blouse or shirt?
Discover and learn about all sewing techniques in one single book:
