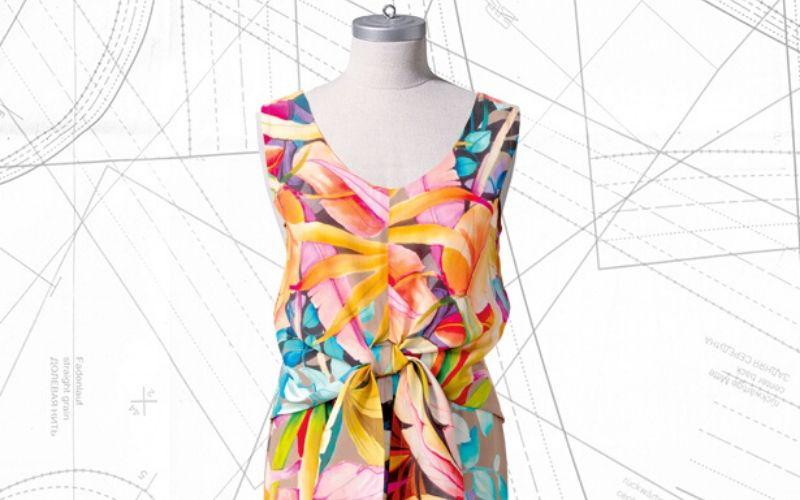
Ready for summer jumpsuit style now? Our easy step-by-step instructions will help you finish up this garment for a summer outing - even if it's your first jumpsuit make.
STEP 1: CUT OUT THE FABRIC PIECES

Fold fabric in half lengthwise, right side facing in. Pin the paper pattern pieces 1, 2, 4, 5 and 6 to the fabric as shown in the pattern layout. Use the hand gauge and tailor's chalk to mark 1.5 cm (5/8") seam allowances and 4 cm (15/8") hem allowance for the trouser pieces on the fabric. Cut out the pieces. Spread out the remaining fabric, right side facing up. Pin piece 3 to the fabric once printed side facing up and once printed side facing down. Mark 1.5 cm (5/8") seam allowance. Cut out the pieces.
STEP 2: CUT OUT THE INTERFACING

Fold the interfacing in half, adhesive side facing in. Pin pieces 5 and 6 at the fold as illustrated. Use pencil to mark 1.5 cm (5/8") seam allowances at the edges. Cut out the pieces and iron on the wrong side of the facings.
STEP 3: TRANSFER PATTERN MARKINGS

Lay facing pieces right sides together again and pin on the pattern pieces. Use dressmaker's carbon paper and a tracing wheel to transfer the pattern outlines (seam and hem lines) and all other markings to the wrong side of all the pieces. Follow the instructions included with the carbon paper. Use basting thread to transfer hem lines and fold lines to right side of the fabric.
STEP 4: FRONT / TIE BANDS

Trim allowances on integral tie bands to 1 cm (3/8") and neaten. Press allowances to inside. Topstitch edges 7 mm (1/4") wide.
STEP 5: CENTRE FRONT SEAM

Lay front pieces right sides together. Pin centre seam and stitch. Backstitch to secure ends of stitching. Neaten allowances and press open.
STEP 6: TROUSERS / CENTRE SEAMS

Lay front trouser pieces right sides together. Pin centre seam and stitch. Neaten allowances and press open from upper edges to beginning of curve. Stitch and press centre back seam likewise.
STEP 7: FRONT ELASTIC CASING

Neaten self-facing on front trousers, turn to inside on fold line and pin. Topstitch upper trousers edge 2.5 cm (1") wide for elastic casing. Use a safety pin as a bodkin to insert elastic for a finished length as follows for size 34: 34 cm (13 1/2"), size 36: 36 cm (14 1/4"), size 38: 38 cm (15"), size 40: 40 cm (15 3/4"), size 42: 42 cm (16 1/2"). Stitch across ends of elastic at side edges of trousers.
STEP 8: BASTE FRONT

Fold side edges of front each to inside on fold line and pin. Pin front pieces to front trousers, matching markings. Baste side edges together (seam number 2).
STEP 9: CENTRE BACK SEAM / SLIT

Lay back pieces right sides together. Pin centre seam and stitch from slit mark to lower edges. Backstitch to secure ends of stitching. Neaten allowances and press open, press to inside at slit.
STEP 10: BACK WAIST SEAM

Pin back piece right sides together with back trouser piece. Stitch pieces together on marked line (seam number 3).
STEP 11: ELASTIC CASING

Neaten allowances together, press onto front trouser piece and pin. Topstitch front trouser piece for elastic casing 2.5 cm (1") wide next to waist seam, catching allowances. Use a safety pin as a bodkin to insert elastic for a finished length as follows for size 34: 32 cm (12 3/4 "), size 36: 34 cm (13 1/2"), size 38: 36 cm (14 1/4"), size 40: 38 cm (15"), size 42: 40 cm (15 3/4") . Stitch across ends of elastic at side edges.
STEP 12: SHOULDER SEAMS

Lay front right sides together with back. Pin shoulder seams (seam number 4) and stitch. Neaten allowances and press open. Stitch shoulder seams, also on facing (seam number 5). Press allowances open. Neaten outer facing edge.
STEP 13: NECKLINE / FACING

Pin facing right sides together with neckline and back slit edges, matching shoulder seams. Stitch. Trim allowances, clip curves. Trim allowances at corners at an angle. Turn facing to inside, baste edges and press. Sew on facing by hand at allowances of shoulder seams, centre front seam and at back slit edges.
STEP 14: ARMHOLES / BIAS TAPE

Press bias tape in half lengthwise, wrong side facing in. Pin bias tape right sides together with armhole edges so that open edges lie on allowance. Stitch bias tape. Trim allowances, clip curves. Turn bias tape to inside, baste and press. Topstitch edges 5 mm (3/16") wide.
STEP 15: SIDE SEAMS

Lay front right sides together with back. Pin side seams (seam number 8) and stitch. Neaten allowances and press open. Sew allowances at armholes to bias tape by hand.
STEP 16: INSIDE LEG SEAMS

Lay front trouser piece right sides together with back trouser piece. Pin inside leg seams (seam number 9), matching centre seams. Stitch. Neaten allowances and press open.
STEP 17: HEM

Neaten hem allowance, press to inside and pin. Topstitch lower edges of trouser legs 3.5 cm (1 1/2") wide, catching hem.
STEP 18: BACK FASTENING

Work a thread loop on one edge of back slit by spanning several threads and covering with buttonhole stitch by hand. Sew button on other edge to match.
FINISHED! #101 06/2020

You will recognize this look from our anniversary pages – here it is as a finished style for you to sew yourself. This jumpsuit features a couture wrapping band at the waistline and its casual cut makes it a true winning style even on the warmest of summer days.