This year, your children’s pencil case will be one of a kind—and handmade by you! Practical and original, this colorful pencil case will quickly become their everyday essential. Thanks to the elastic loops sewn inside, every pen, pencil, or eraser has its own place and stays neatly organized. It’s the perfect sewing project to combine creativity with functionality... and it will delight both kids and grown-ups on the first day back to school!
In this article, we’ll guide you step by step to sew this children’s pencil case that’s as useful as it is adorable.
Supplies
- Thick cotton or canvas fabric (0.75 m)
- Decovil Light (interfacing)
- 40 cm zipper
- Elastic, 5 mm wide: 35 cm
- Vliesofix (fusible web)
Cutting Out & Preparation
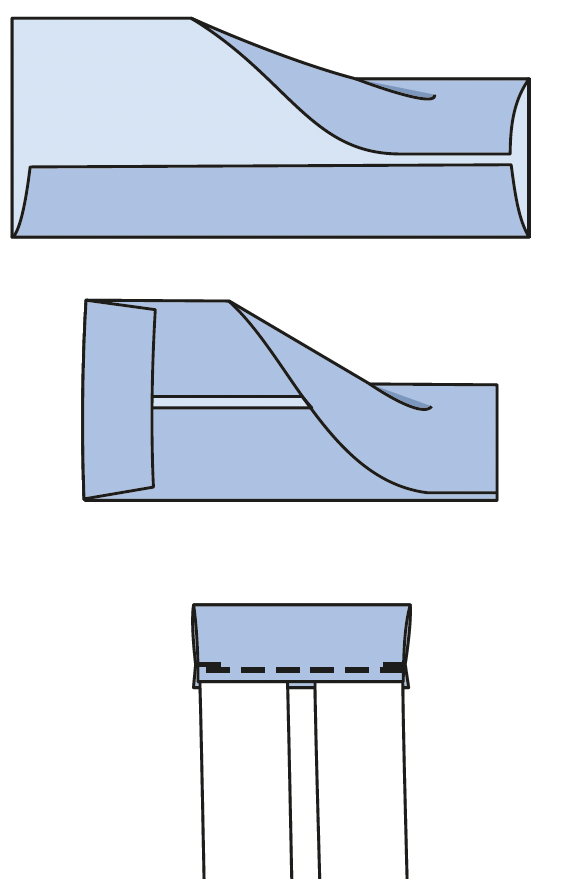
For the pencil case, you will need pieces 1 to 5 from the pattern sheet:
- Pencil case, cut 2 on the fold
- Bottom, cut 1 on the fold
- Zipper end tab, cut 1
- Long trim, cut 1
- Short trim, cut 1
A 1 cm seam allowance is included in the pattern. You’ll find the instructions and the PDF pattern available for free to download at the end of this article.
Fuse the Decovil Light to the wrong side of both the inner and outer parts of the pencil case (pattern piece 1). For the inner piece, cut the interfacing without seam allowances.
Creation

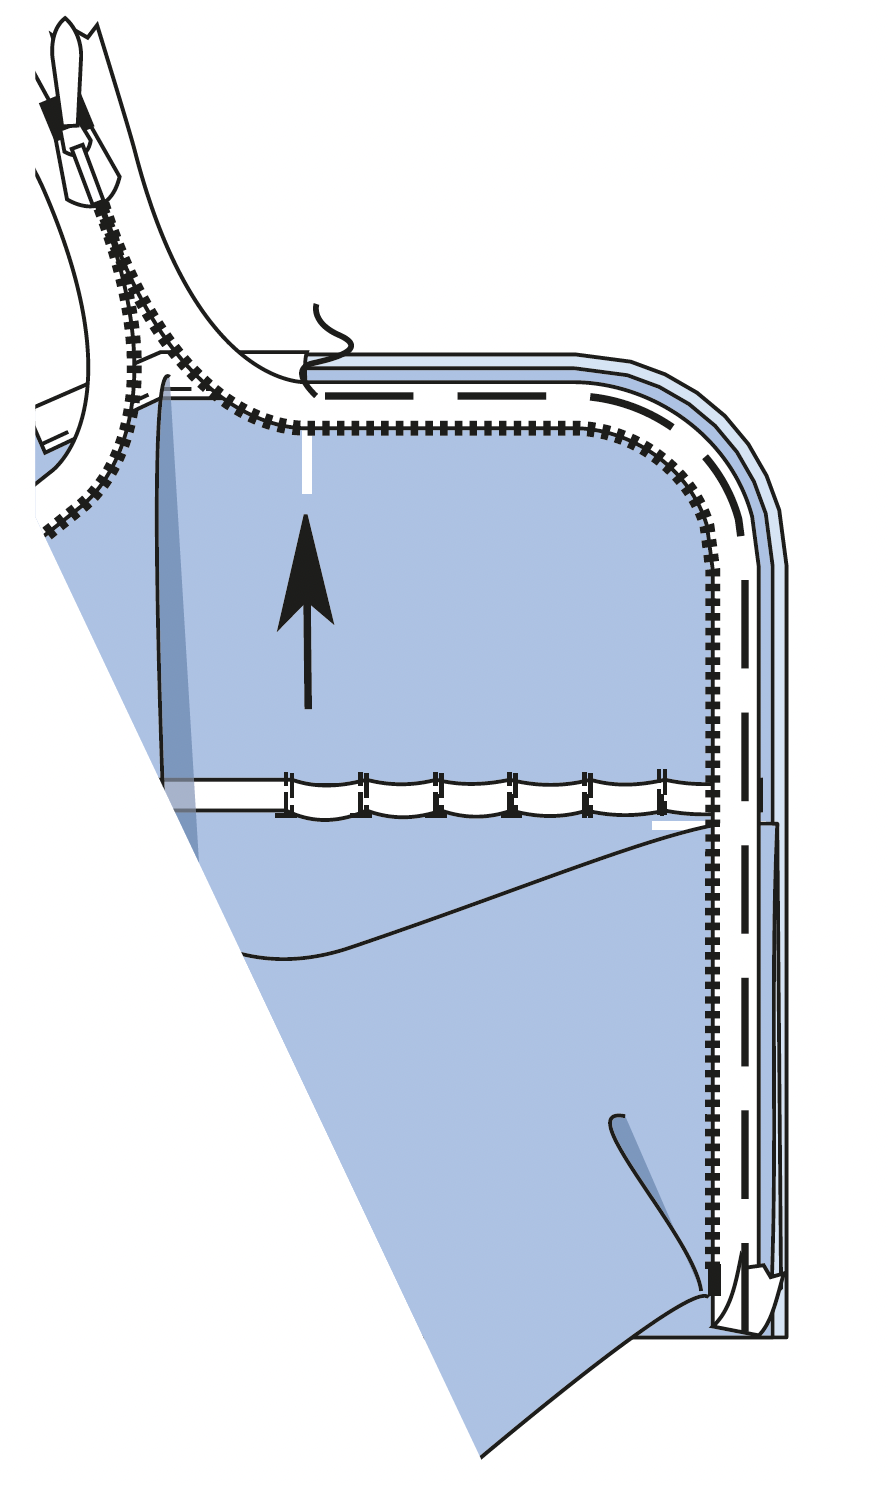
STEP 1 : Elastic Bands
Stitch the elastic following the markings on the inner piece, leaving a bit of slack between the seams to accommodate the pencils.
Place the two pouch pieces wrong sides together, pin them, and stitch 5 mm from the edges all around the perimeter.
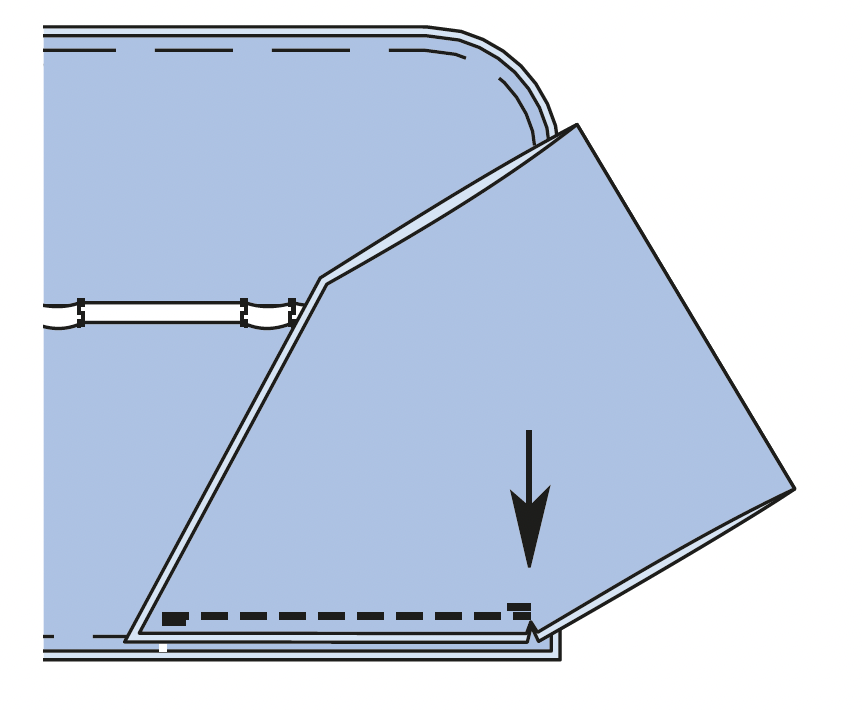
STEP 2 : The Bottom
Fold the base piece in half, with the wrong side inside. Pin its slanted edges to the bottom edge of the pouch and stitch, matching notch 1 to notch 1. Secure the ends of the seam with backstitching.
Clip the seam allowance of the base at the corners (arrow). Pin the edges of the base to the front edges of the pouch and stitch, matching notch 2 to notch 2.
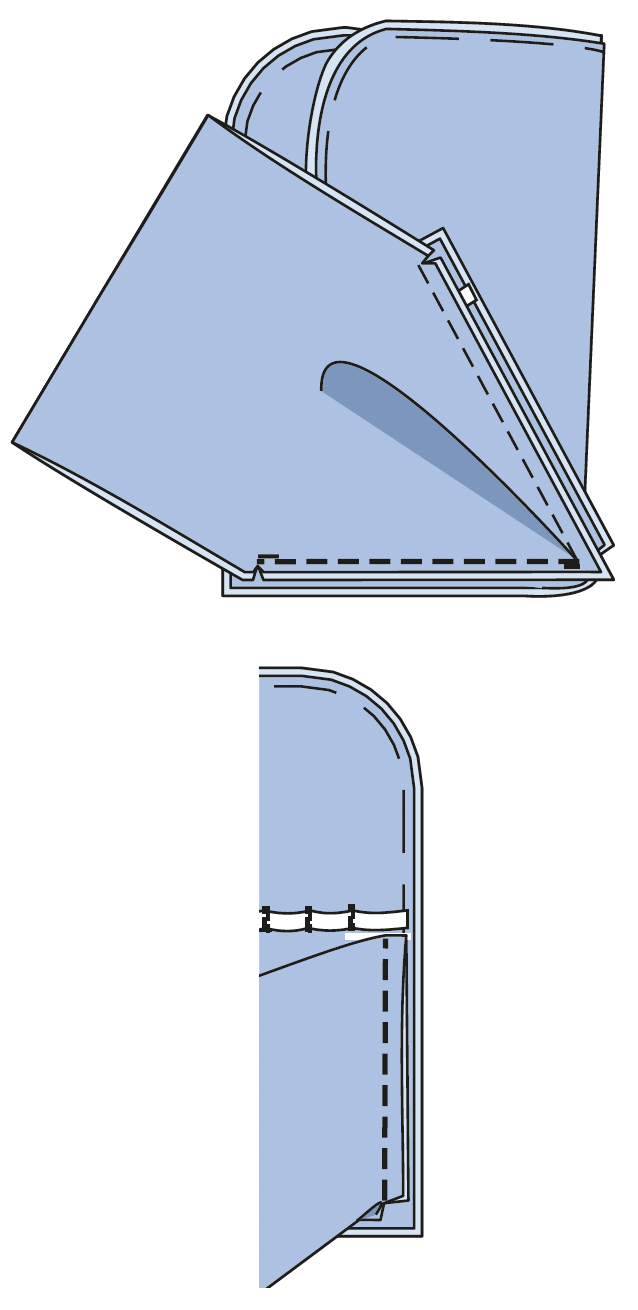
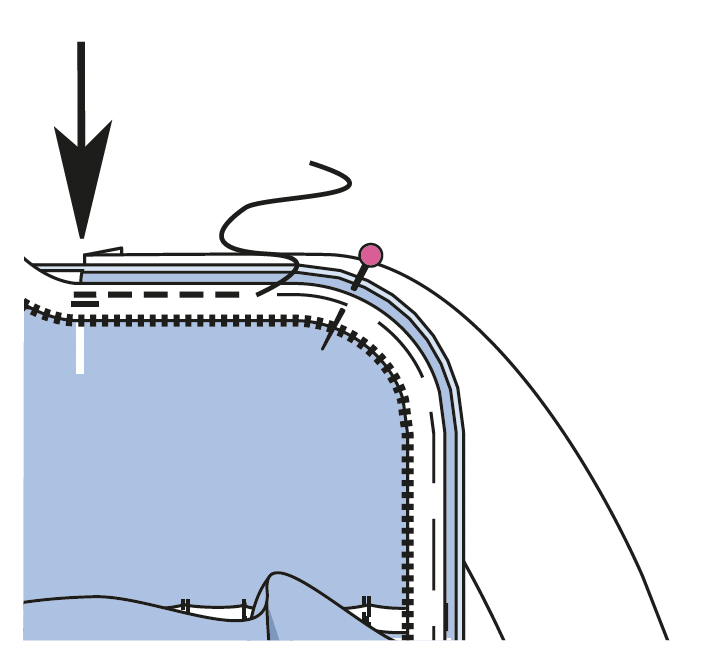
STEP 3 : The Short Trim
Fold the seam allowances at both ends of the small trim (piece 5) to the wrong side and press.
Pin the trim to the right side of the upper edge of the pencil case, between the transverse markings, and stitch in place.
Fold the trim to the wrong side, wrapping it around the edge. Tuck in the seam allowance and hand-stitch it along the assembly seam.
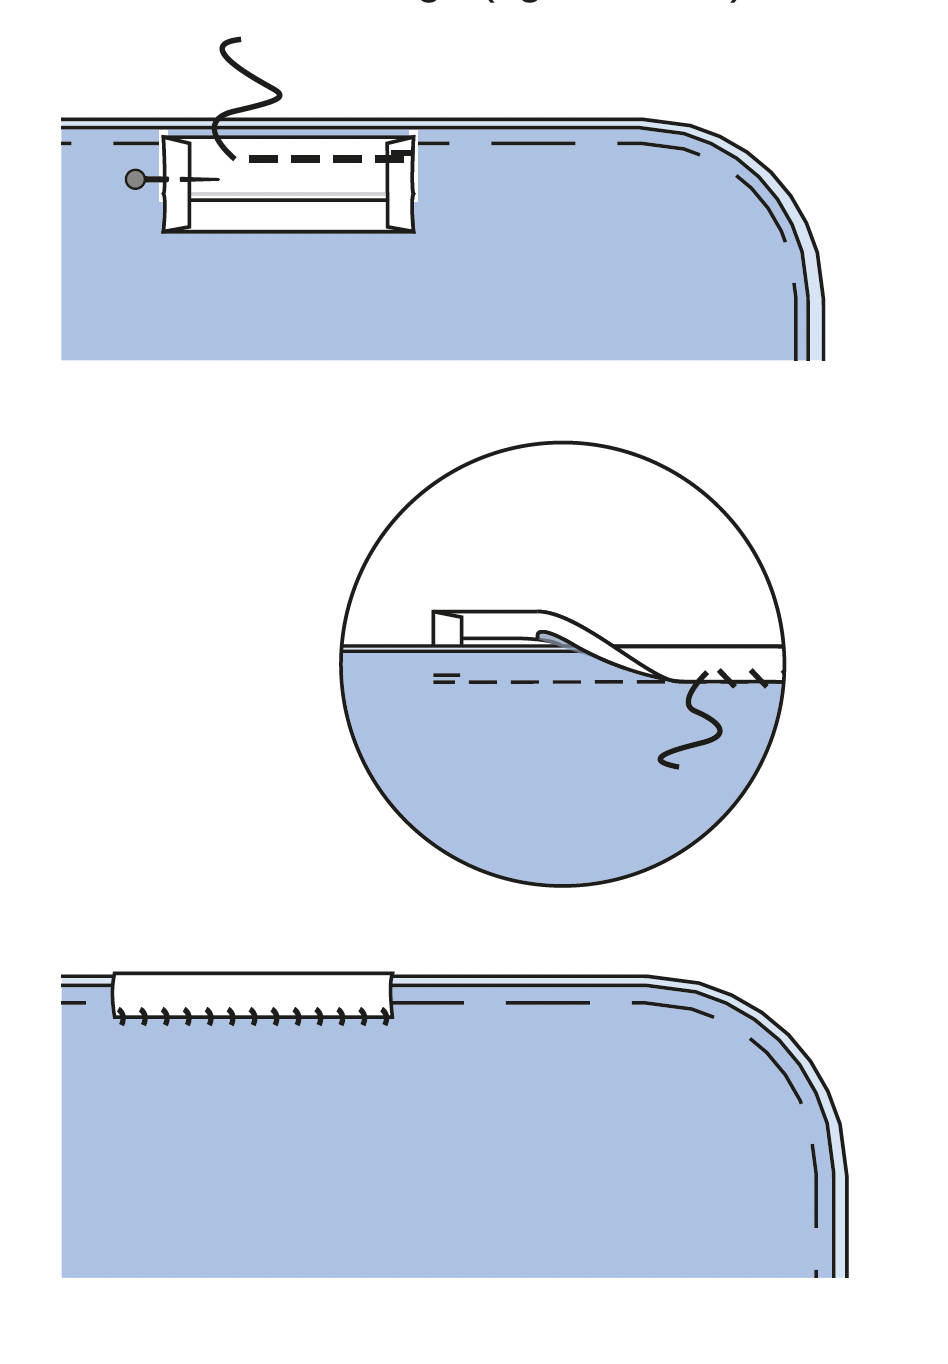
STEP 4 : The Zipper
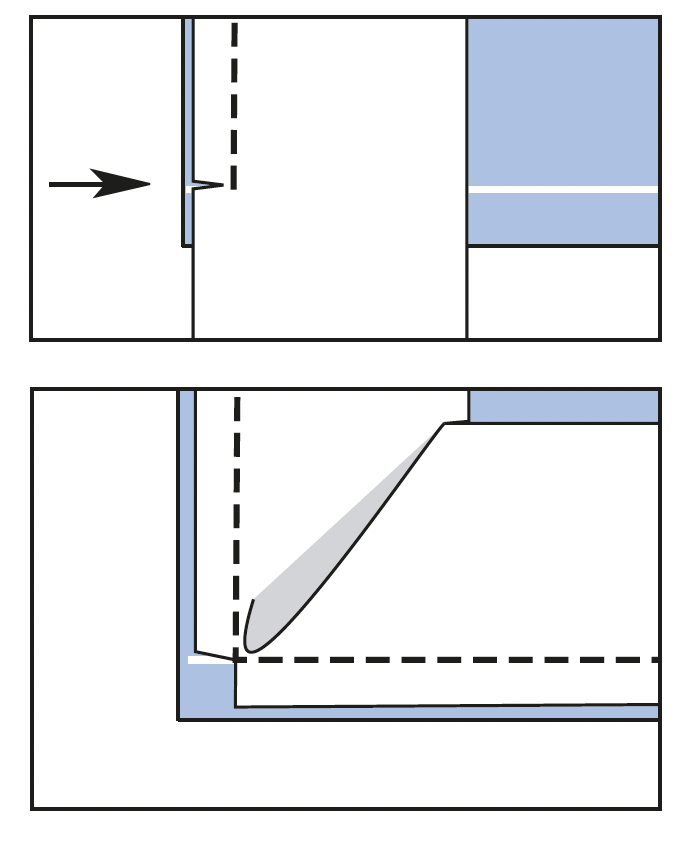
Open the zipper. Baste the zipper ribbons onto the wrong side of the outer edges of the pencil case, starting at the lower corners.
Fold the ends of the ribbons. From the transverse marking (arrow) = start of the trim, the zipper should remain free
STEP 5 : The Long Trim
Bind the outer edge of the pencil case with the long trim (piece 4). Fold the excess trim at the end to the wrong side and press. Stitch the trim right sides together along the edge, gently stretching it around the curves. Start and finish at the top edge of the pencil case.
Clip the excess of the trim at the corners. The zipper ribbons and the bottom are caught without sewing. At the middle of the bottom edge (the tip of the bottom), stitch as far as possible towards the tip. Interrupt the stitching and start again. At this point, the trim will be hand-stitched later.
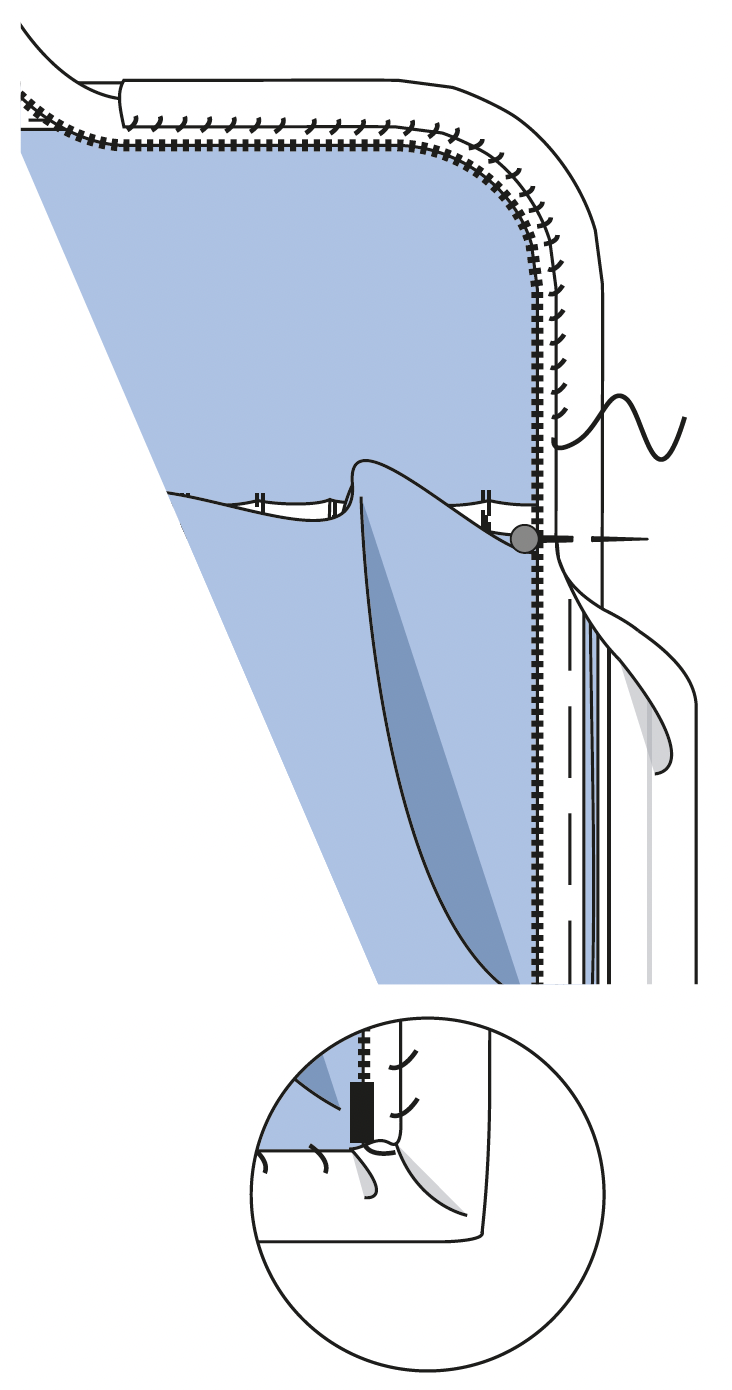
STEP 6 : Attach the Trim
Fold the trim over to the inside around the edge, tuck in the allowances, and hand stitch it onto its stitching, making a small pleat at the corners.
STEP 7 : The Zipper Tape
Fold the seam allowances of piece 3 to the inside, press. Fold the zipper tape in half, with the wrong side inside. Place the tape around the end of the zipper and stitch.
It's finished!
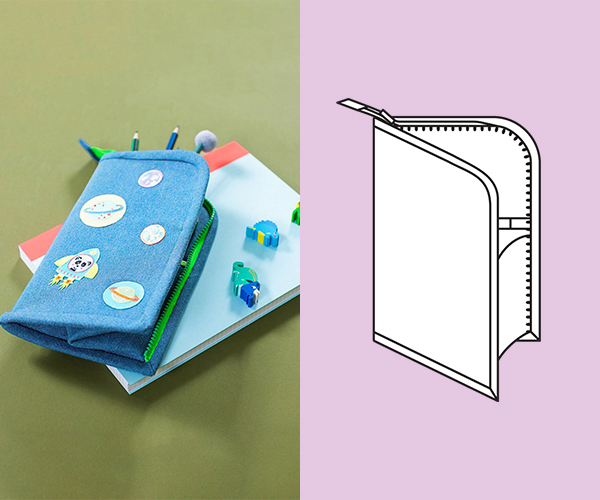
And there you have it, you now know how to make this beautiful pencil case! With its original design and clever elastic loops, it will accompany children throughout the school year. This is a simple and practical sewing project, perfect for starting the school year off right… or for gifting a handmade present that’s sure to delight.
And if you want to find the instructions for this DIY in PDF form or print it to complete it later, feel free to download it for free by clicking the button below:
