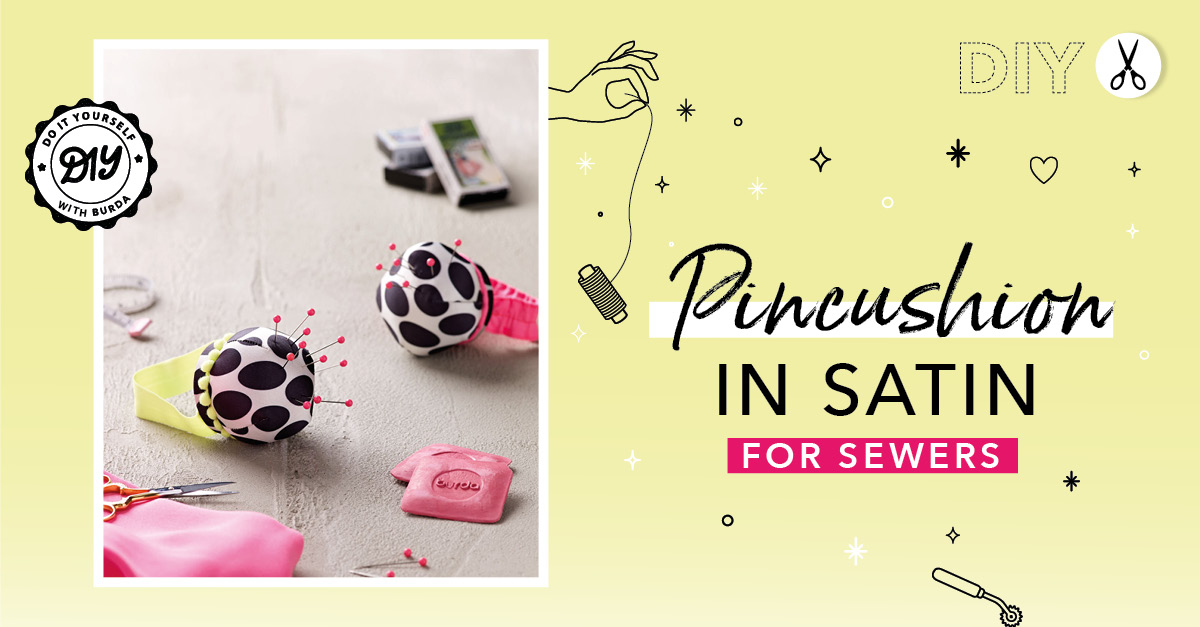
Ideal for keeping all your pins within reach during sewing, the pin cushion is an indispensable accessory for seamstresses. Why not create your own homemade pin cushion? With simple supplies and a few fabric scraps, you can make your own pin cushion! Follow our DIY tutorial to make it in no time at all!
SUPPLIES

- Satin fabric ‘Punkte’ (Fabric House)
- Elastic neon yellow
- pom-pom trim (or piping) neon yellow
- thread neon yellow (Gütermann)
- jam jar lid Ø 5 cm (2 in)
- straight pins
- hand sewing needle
- fabric scissors (all Prym)
- wadding
Templates for A and B in original size in the sewing supplement on pages 24/25
Cutting Out
- A (LID): 1 X FROM OUTER FABRIC WITHOUT ALLOWANCE
- B (PINCUSHION): 1 X FROM OUTER FABRIC WITH 1 CM (3/8 IN) SEAM ALLOWANCE ALL AROUND
Here's How
STEP 1
Make a line of stitching all around to gather piece A. Place lid at centre. Pull bobbin thread evenly so that the fabric is smooth around the lid. Secure threads on the wrong side.
STEP 2
On piece B, close the four seams right sides together. Stitch darts. Trim seam allowances and press apart.
STEP 3
Fill piece with wadding.
STEP 4
At lower edge, sew a line of stitches by hand to gather. Pull tight and sew.
STEP 5
Sew on pom-pom trim to the edge of the lid all around.
STEP 6
Pin the pincushion to the lid and sew on by hand all around.
STEP 7
Cut the elastic to comfortably fit your wrist. Overlap ends and stitch. Sew the elastic to the center of the lid.
It's finished!

This unique, handmade accessory will never leave you during your sewing sessions!
And if you want to find the templates for the pin cushion or print this DIY to make it later, feel free to download it for free by clicking the button below: